 If your company is offering Azure Manage Services or running a Service Provider business, you are probably aware of the Microsoft Azure Lighthouse offering where you can centrally manage Azure subscriptions. What does it take to set up the Azure Lighthouse?
Early last week, one of the partners I work with asked for some help to configure and deploy the Azure Lighthouse to centrally manage some of his customer’s backups using the Veeam Azure Backup for Azure product. To better provide support and help, I went through the steps for deploying Azure Lighthouse on my Azure subscription. This blog post summarises the processes I used to successfully configure and deploy the Azure Lighthouse product to gain better knowledge of the offering.
Before we get started, I would like to thank Dipesh Bhattarai from Data3 and Eric Ellenberg from Veeam. Dipesh help me speed up the Lighthouse deployment and helped with some quick troubleshooting. Eric went through the deployment process himself and became the “Veeam Expert” with Lighthouse/Veeam implementations. His steps to deploy Lighthouse are a fantastic alternative to the way you will read on this blog post; his steps will be shared at the end of this article.
Architecture
To successfully follow and deploy the Azure Lighthouse, you require the following:
- Azure AZ command line installed
- Two different Azure subscription
- SP Azure Tenant
- AD Security Group
- Tenant Azure:
- Az Command installed
- Run Script
- SP Azure Tenant
The diagram below illustrates the Azure Lighthouse architecture:

Note: Lighthouse is available with all Azure subscriptions; there is no requirement to be a CSP to follow the blog.
Service Provider Side
This is where the process starts. A Service provider wants to manage his Azure customers remotely. Therefore, the starting point is at the service provider’s Azure tenancy. To get started, we will run through the following steps:
- Create an AD Group
- Create a test user and add to the group
- Extract the Azure IDs of:
- Tenancy
- The new created Group
- and the Contributor Role
To get started, let’s first create the Azure AD Group by running the following steps:
- From Azure, subscription browse to the Azure Active Directory; see below.
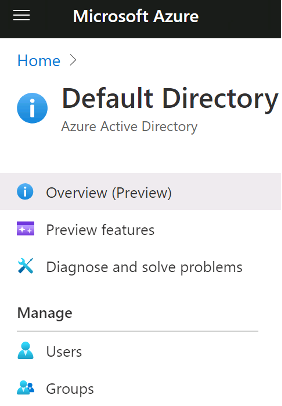
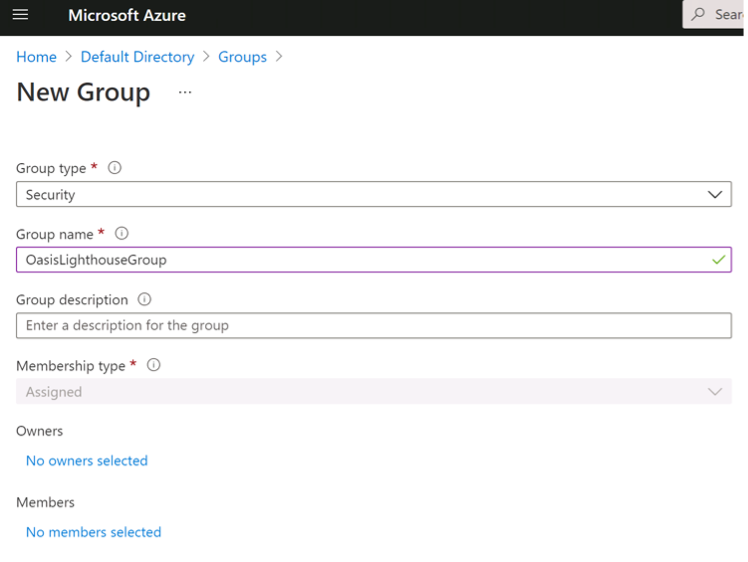
- Next, chose Groups, then create a new group with a security type; the name of the group we will use throughout this blog is: “OasisLighthouseGroup.”
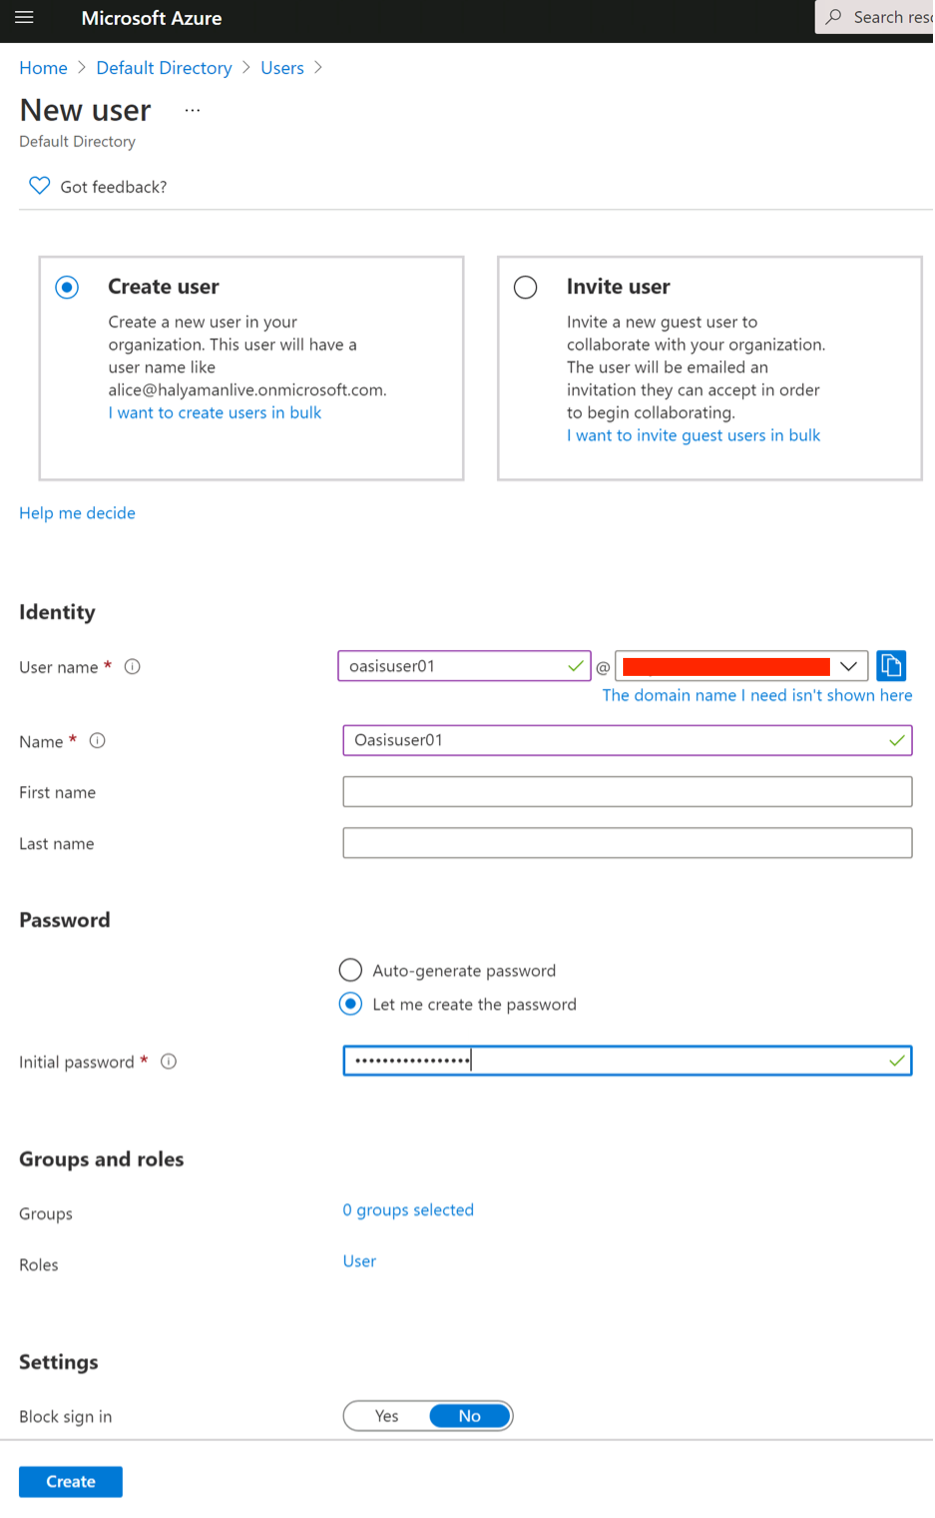
- After the group has been created, we can create users to manage the customers. See below.
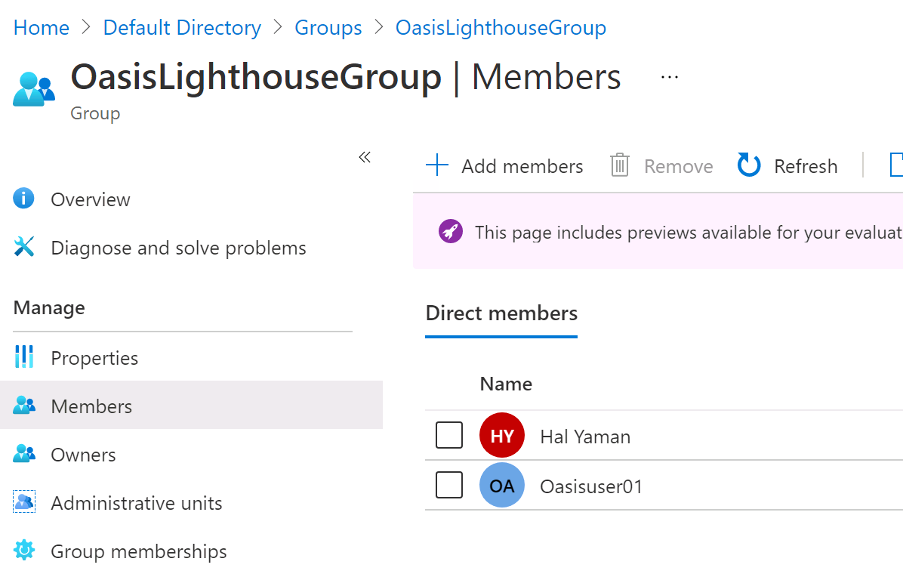
- Next, assign the customers to the newly created group; in this example, OasisLighthouseGroup.
- After the Users and Group have been successfully created, it is time to open a Powershell command to install the AZ command tool. Run the following command first:
- Install-Module -Name Az -Scope CurrentUser -Repository PSGallery -Force
- The above command takes some time to complete; after it has completed and the AZ command line has installed successfully, we are ready to connect to the Service Provider’s subscription from the AZ command by running the following command:
- connect-azaccount
- After you have logged in to your Azure subscription, you are ready to get the Azure IDs necessary for the Azure Lighthouse Tenant configuration.
Retrieve the Tenant ID with the command: Get-AzTenant (See the screenshot below.)
Record the Tenant ID.

- The Group ID: (Get-AzADGroup -DisplayName ‘OasisLighthouseGroup’).id (See the screenshot below.)
Record the Group ID
![]()
For the Service Provider to manage the Tenant subscription, it must have a role assigned to it. For the example I am using on this blog post, I am assigning a Contributor Role. The role ID is configured using the following command:
(Get-AzRoleDefinition -Name ‘Contributor’).id
Note: Contributor is the highest Role you can assign, Lighthouse does not allow assigning Owner or Admin to the Tenant subscription.
-
-
- Record the Contributor ID
-

After you have recorded the IDs returned by the command, download the script from this link
- Save the script to a folder; extract it to the folder.
- Open the rgDelegatedResourceManagement.parameters.json file, note, I like using “Visual Studio Code” but you are welcome to use any other preferred JSON editor. Modify the following elements of the file:
-
“managedByTenantId”: {“value”: “<TenantID>”
-
“principalId”: “<GroupID>”,“roleDefinitionId”: “<Role>”,“principalIdDisplayName”: “OasisLighthouseGroup”
-
- Save the modified .json file to a Zip file alongside the original file in the folder; send the Zip file to your tenant.
With those steps above, the service provider is now ready to bring onboard any tenant using remote management after the Tenant goes through the following steps:
Tenant Side
The only task the Tenant is required to run is to download and run the scripts the Service Provider supplied.
To get started, the Tenant must deploy the Az command and run the following steps:
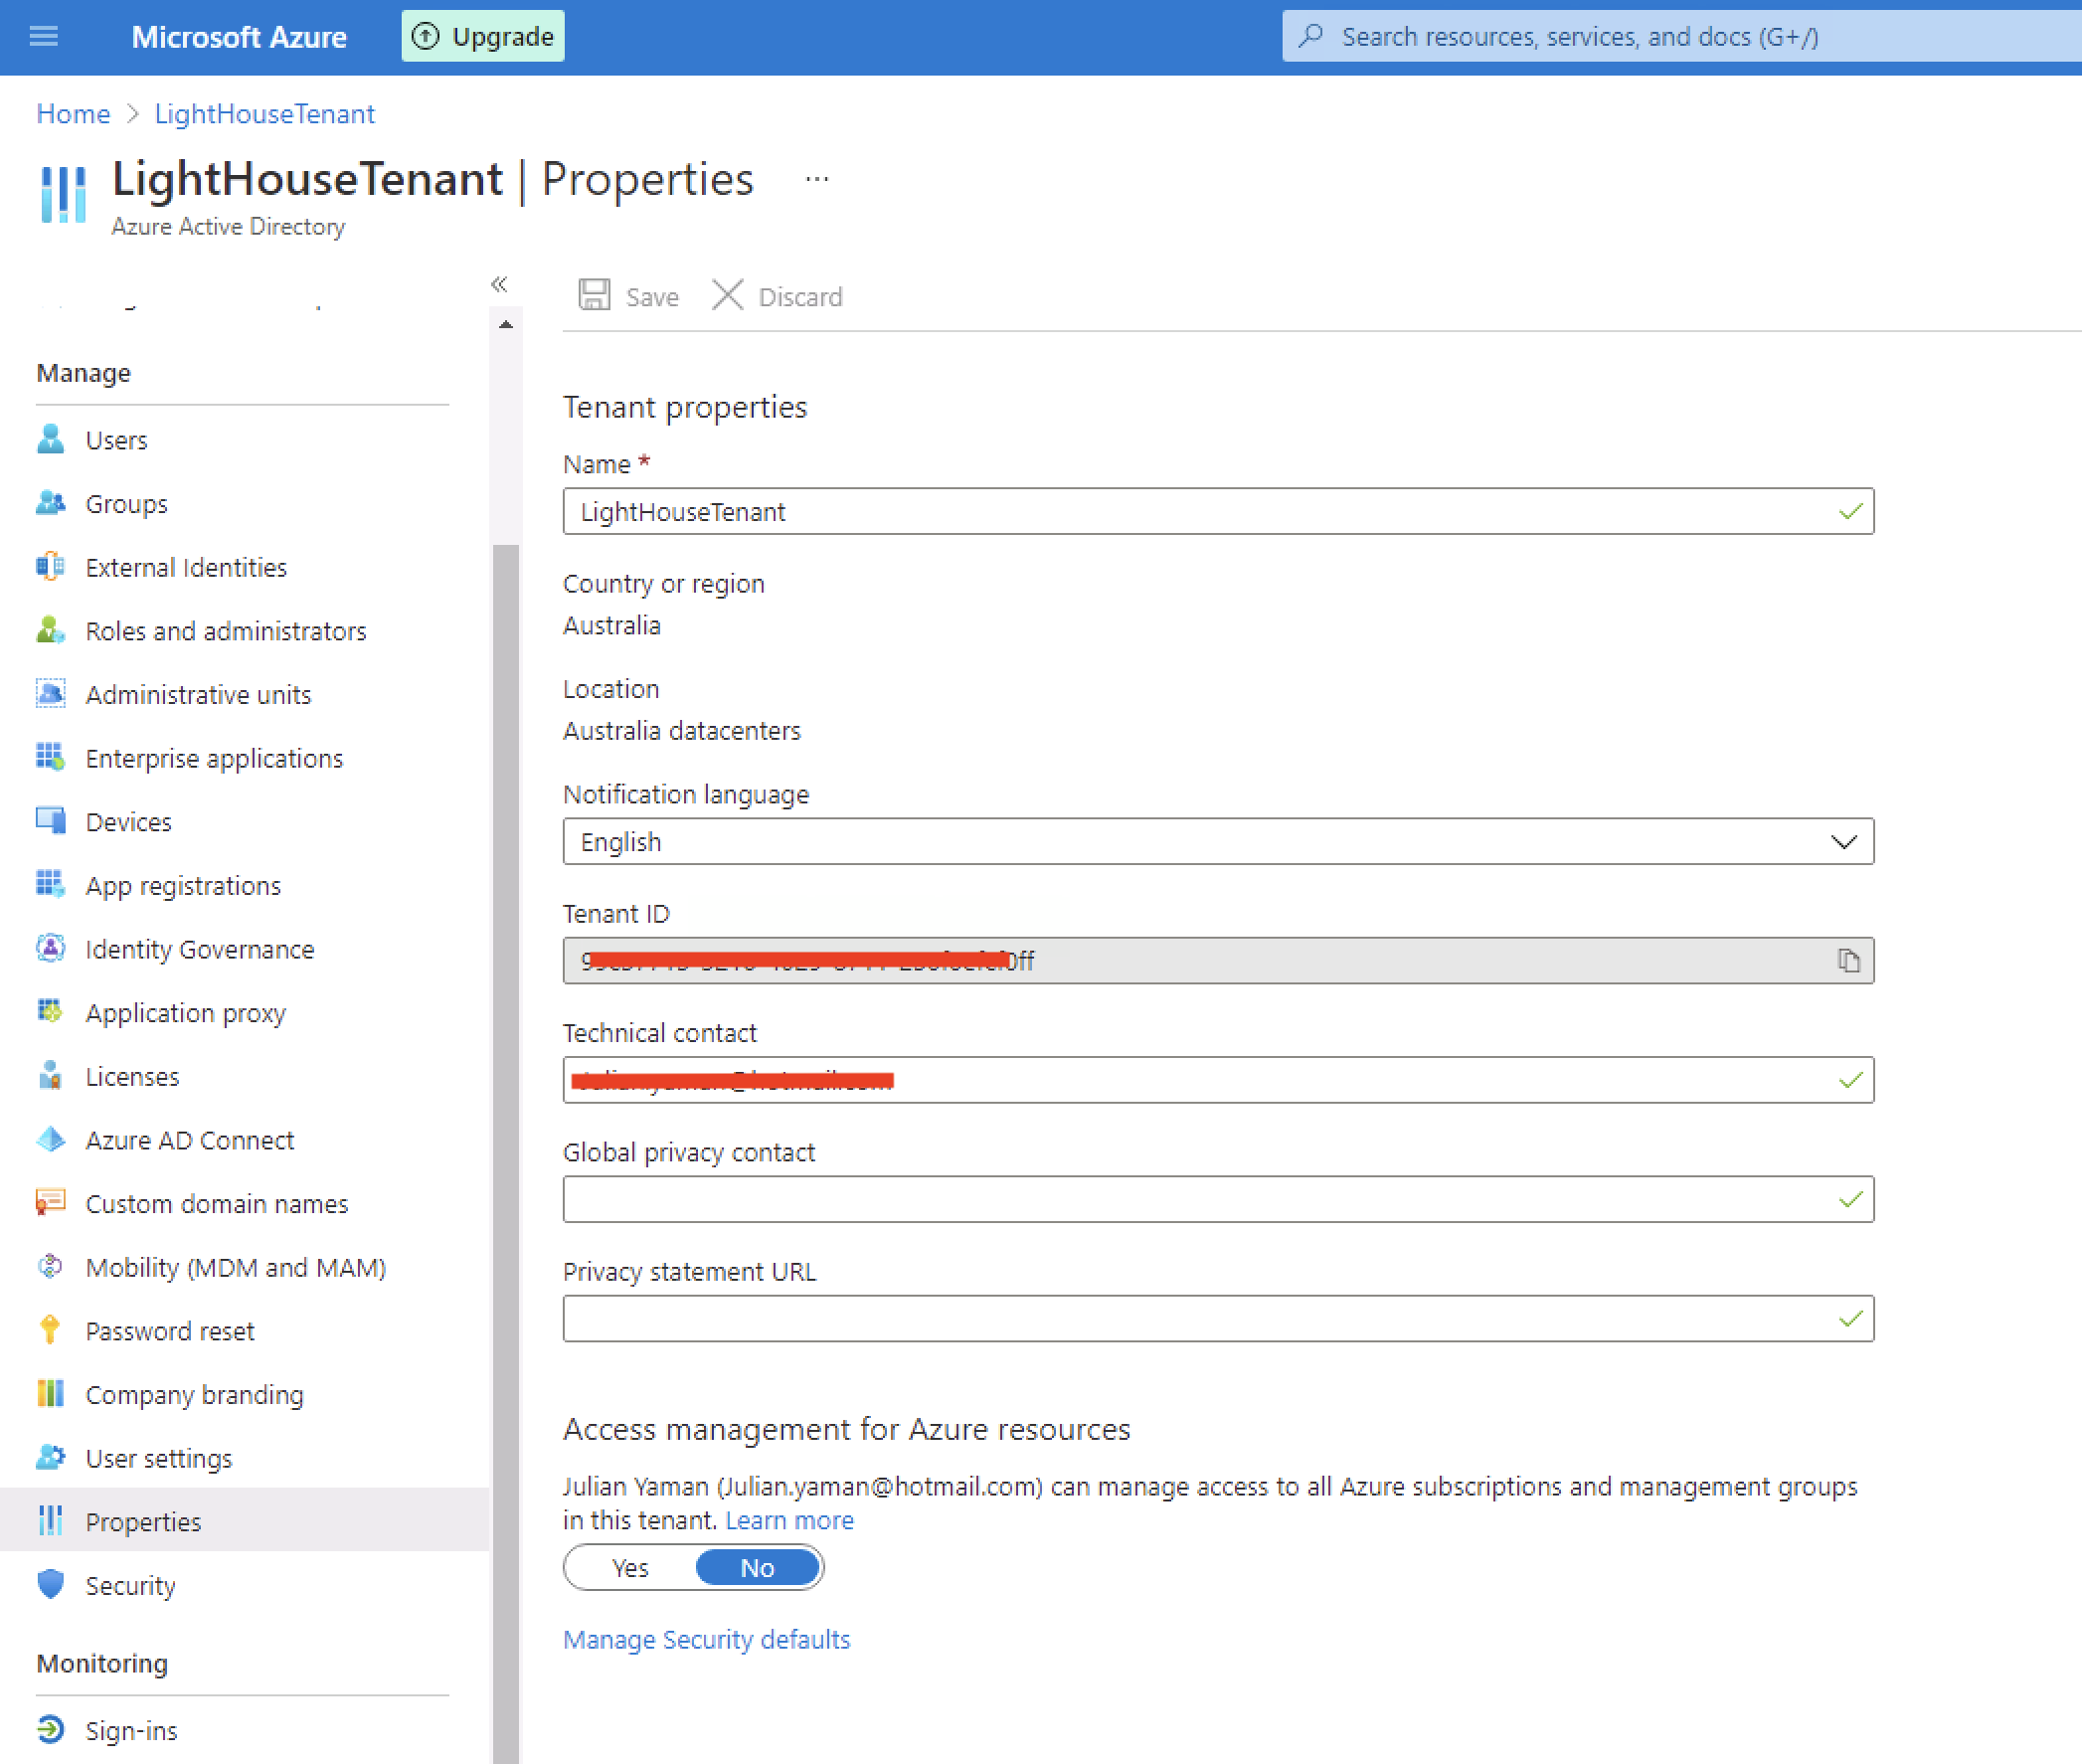
- Recommended: Change the Azure “Tenant Properties Name” from the default Name to the TenantName. (This step will be a critical step when managing multi-tenants and when you integrate with Veeam VBA)
- Install the Az command: Install-Module -Name Az -Scope CurrentUser -Repository PSGallery -Force
- Connect to the Azure Subscription: connect-azaccount
- Download the SP Shared Scripts and copy them to the server where the Az command will run. (In our blog example, the JSON files are copied to “C:\Azure_Lighthouse”)
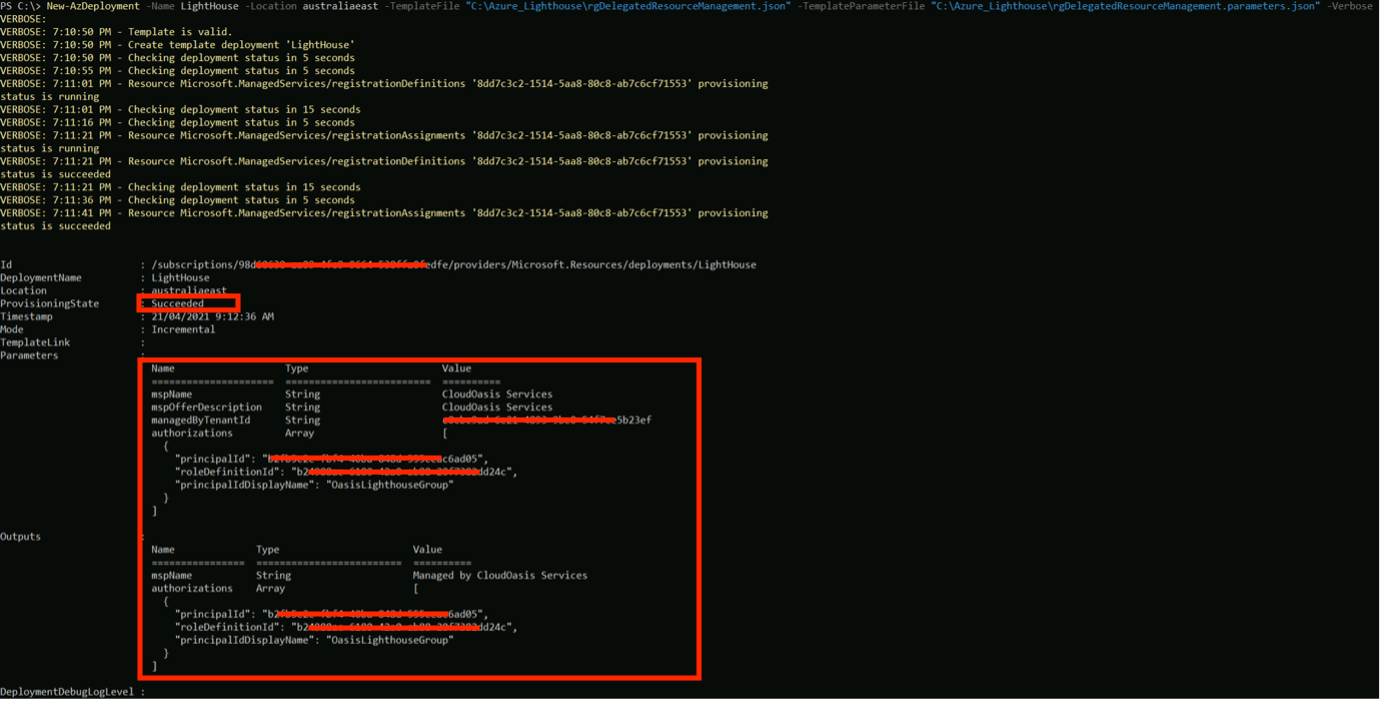
- Run the deployment Command:
New-AzDeployment -Name LightHouse -Location australiaeast -TemplateFile “C:\Azure_Lighthouse\rgDelegatedResourceManagement.json” -TemplateParameterFile “C:\Azure_Lighthouse\rgDelegatedResourceManagement.parameters.json” -Verbose
You can confirm that the command has run successfully by checking the command output:
With those steps above, you have allowed your Service Provider to remotely manage your Azure subscription.
Service Provider Confirmation
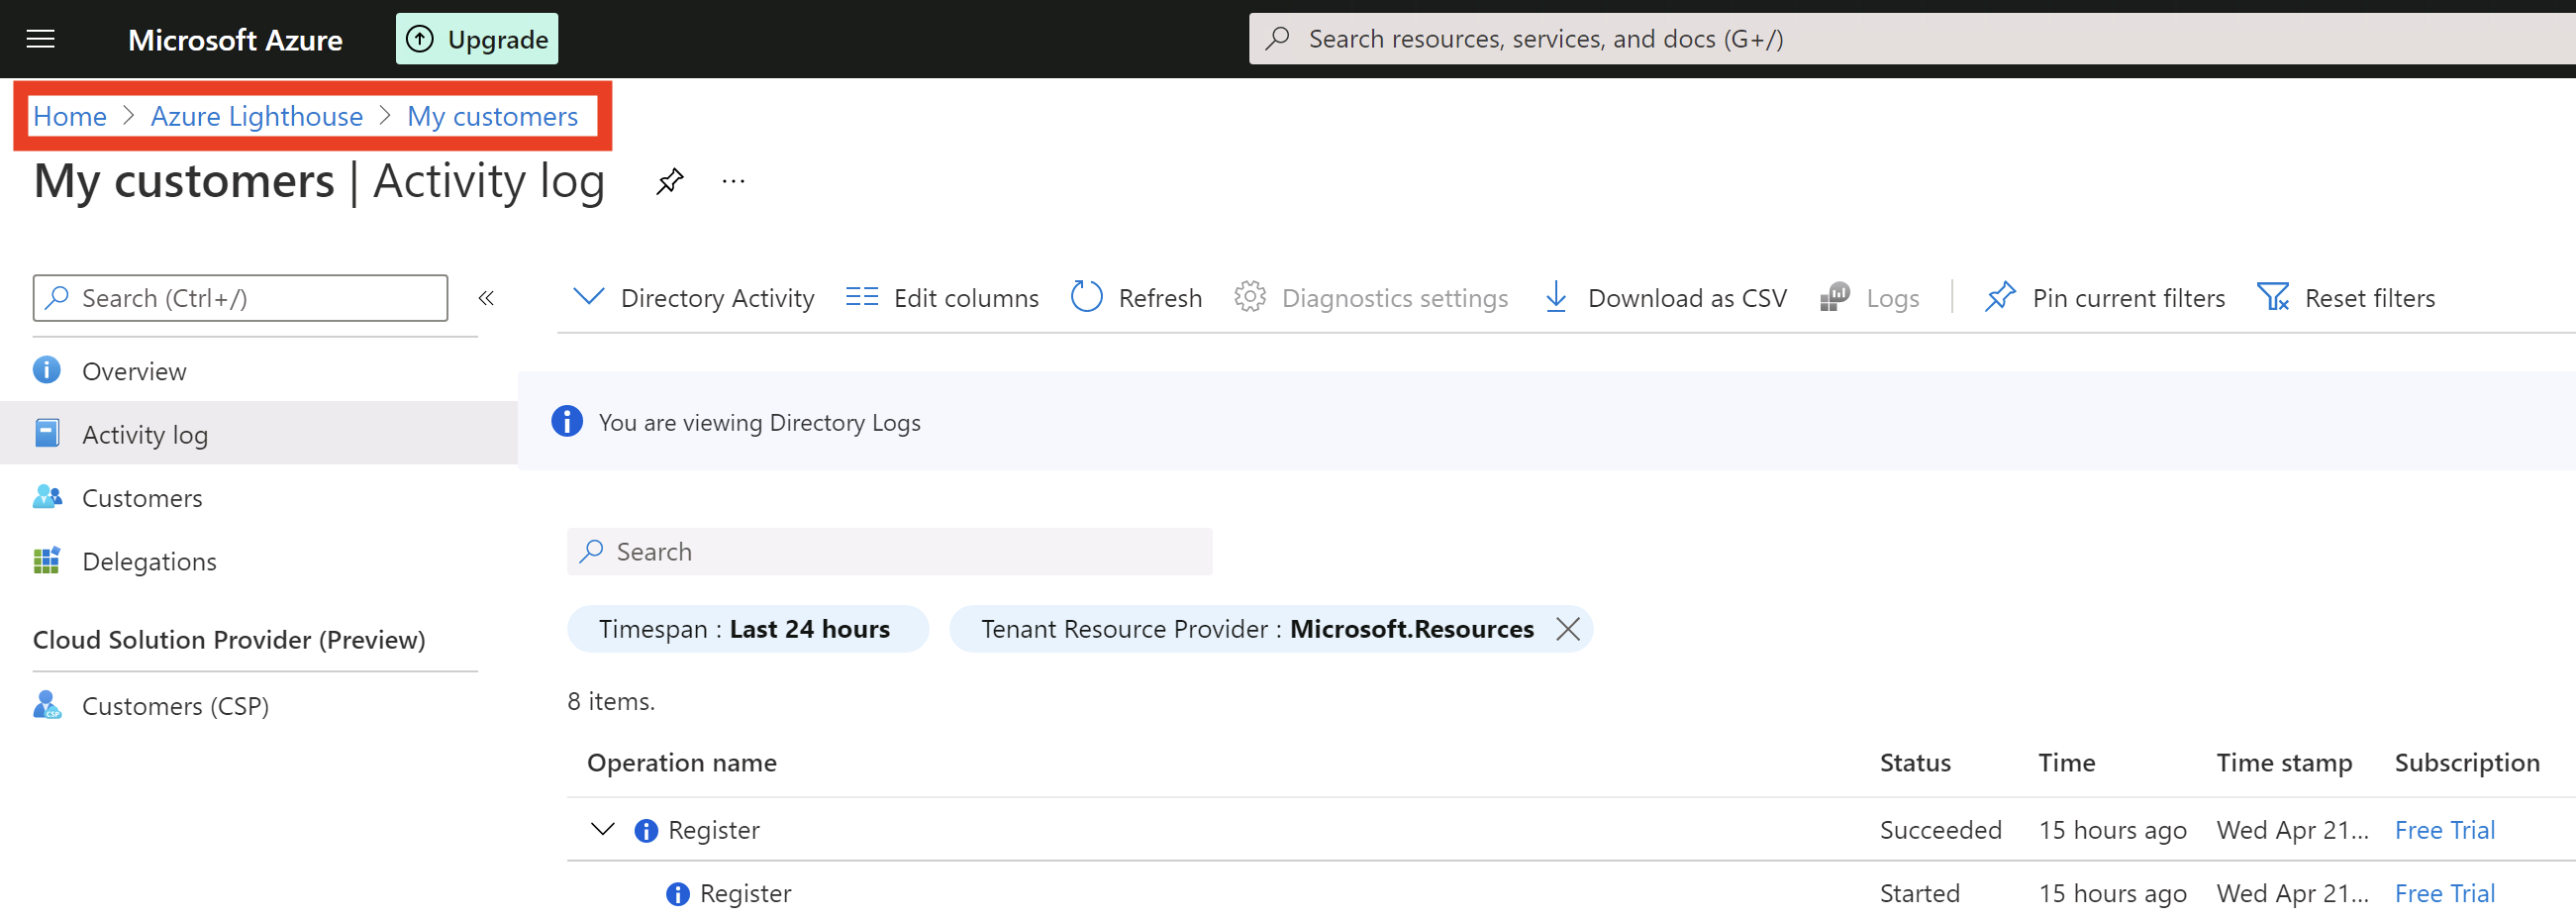
The service provider can confirm that the Tenant deployment ran successfully, by browsing to Home -> Azure Lighthouse -> My Customers, and check the Activity log.
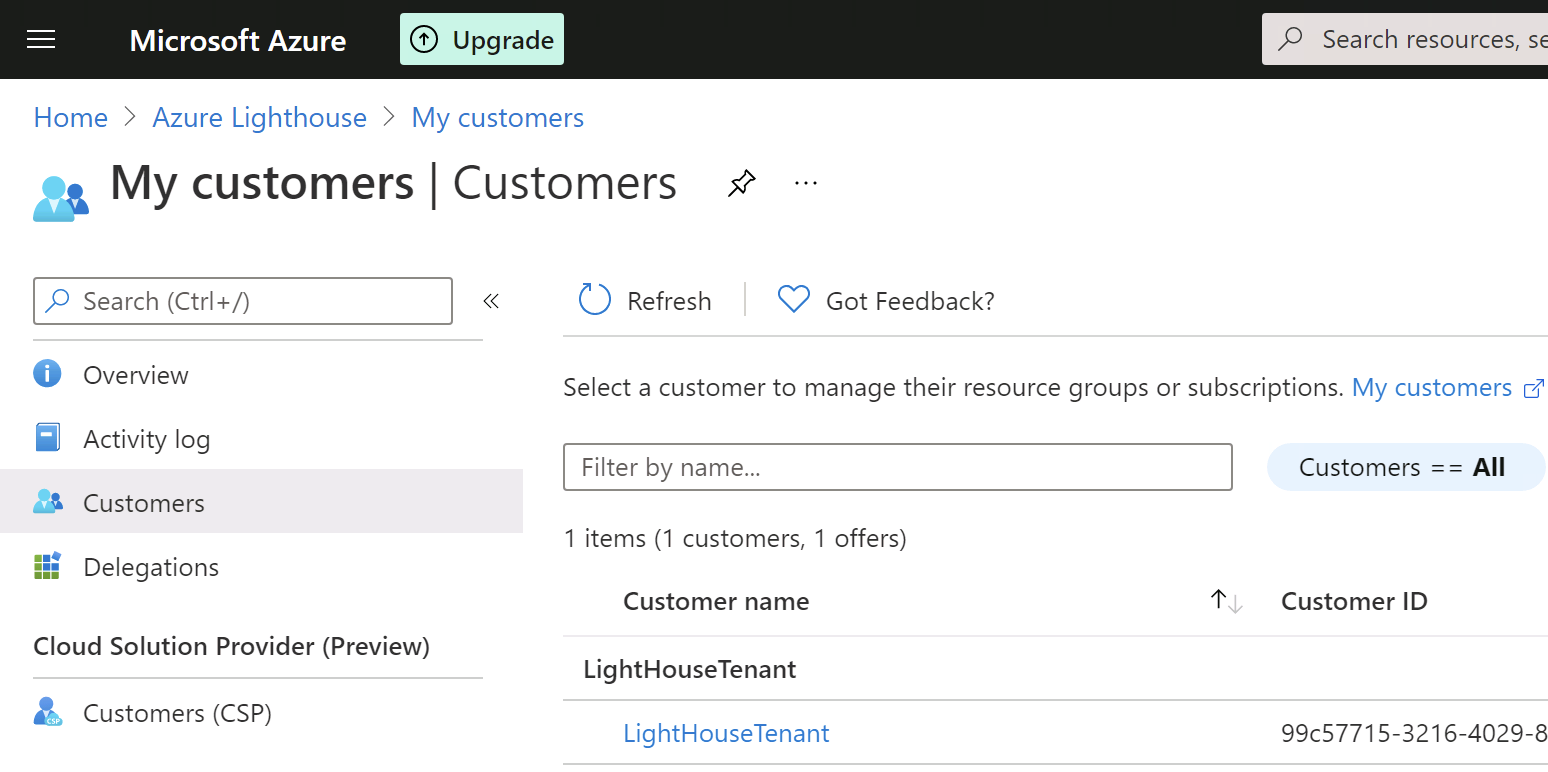
Under My customers | Customers, the Tenant subscription should appear:
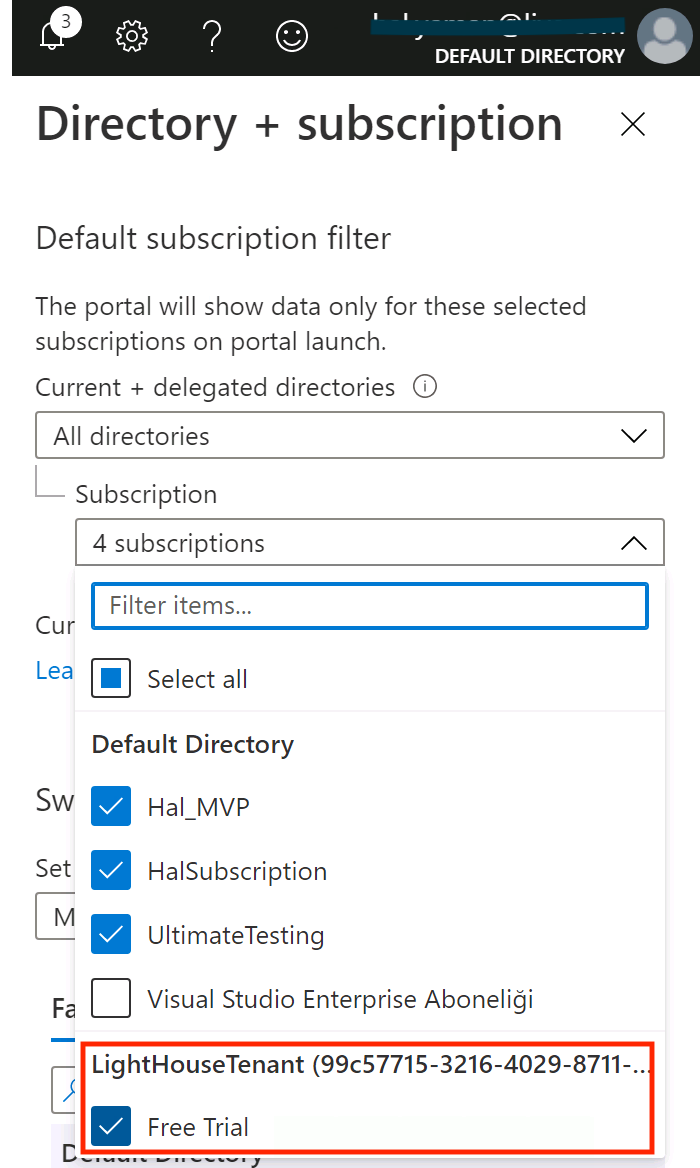
- For a Service Provider to manage the Tenant Subscription, any user who belongs to the group “OasisLighthouseGroup” can see and connect to the Tenant subscription using the Switch Directory:
Conclusion and Next Step
In this blog post, I took you through the steps to help you get started with, and to deploy, your Azure Lighthouse to remotely manage other subscriptions falling under your organization responsibility. I am surprised at how easy the process is but must understand the logic behind it to be able to adopt the best architecture that will fit your objectives. Please don’t hesitate to ask any questions, and please share the blog to help others learn, and to be ready for the next blog post. Finally, use the following official Microsoft link if you wish to learn more about the Azure Lighthouse.
An Alternative Method of Deployment
As promised at the beginning of this blog post, if you are seeking an alternative, non AZ_Cli way to deploy the Azure Lighthouse, then read the following steps by Eric Ellenberg:
Note: I have shared the steps exactly as provided to me, without alteration and the below is preparing you to integrate with Veeam VBA.
GENERAL:
1) Visit Onboard a customer to Azure Lighthouse – Azure Lighthouse | Microsoft Docs. The links to the delegated resource management template and template parameter files are located on this page. These files will be supplied to the Azure CLI command we will run in a later step to associate the service provider tenant to the customer tenant.
IN THE SERVICE PROVIDER TENANT:
2) Log in to the Azure portal of the service provider tenant.
3) Go to the Azure Active Directory service.
4) Copy the Tenant ID from the overview page and paste into a temporary text file.
5) On the left panel, go to Groups.
6) Create a new group, type Security. Give the group a name that will identify it as being used for Veeam – e.g., Lighthouse-VeeamBackupAzure.
7) On the groups page, select the newly created security group.
8) Copy the Object Id and name of the group and paste into a temporary text file.
9) Create other groups as desired to perform management tasks in the customer tenant. Copy the Object Id and name of each group and paste into your temporary text file.
a. See the Create an Azure Resource Manager template section of the Onboard a customer to Azure Lighthouse page for examples of groups and role assignments.
b. “Tip: We recommend assigning the Managed Services Registration Assignment Delete Role when onboarding a customer, so that users in your tenant can remove access to the delegation later if needed. If this role is not assigned, delegated resources can only be removed by a user in the customer’s tenant.”
c. Tip translation: make sure you assign an identity in the service provider tenant the Managed Services Registration Assignment Delete Role in the customer tenant.
EDIT THE TEMPLATE PARAMETERS FILE:
10) In this example we are onboarding a customer’s subscription to be managed via Lighthouse. Therefore, we are using the delegatedResourceManagement.json and delegatedResourceManagement.parameters.json files for our setup. These files are linked from the Onboard a customer to Azure Lighthouse – Azure Lighthouse | Microsoft Docs page.
11) Open the delegatedResourceManagement.parameters.json file in your text editor of choice. Visual Studio Code is recommended for its rich formatting and validation capabilities.
12) Supply values for mspOfferName and mspOfferDescription parameters.
13) For the managedByTenantId key, supply the Tenant ID copied from step 4.
14) In the authorizations array:
a. For each principalId, supply the ObjectId of the group.
b. For each principalIdDisplayName, supply the name of the group.
c. For each roleDefinitionId, supply the role identifier of the built-in Azure role you wish for the given identity to have in the customer’s tenant. The full list of Azure built-in roles, with unique identifiers, is located here: Azure built-in roles – Azure RBAC | Microsoft Docs.
15) For the Lighthouse-VeeamBackupAzure group, supply the Object Id copied from step 8 as the principalId. The roleDefinitionId should be b24988ac-6180-42a0-ab88-20f7382dd24c, which is the unique ID of Azure’s built-in Contributor role.
16) Verify that your template parameter file is properly formatted and confirm the roles and IDs that will be assigned to the identities managing resources in the customer tenant. Save the template parameter file.
IN THE CUSTOMER TENANT:
17) In this example we are using the Azure CLI to deploy the template in the customer tenant that will apply the associations defined in the parameters file. Link to Microsoft’s example here: https://docs.microsoft.com/en-us/azure/lighthouse/how-to/onboard-customer#azure-cli-2
18) Open Azure CLI and run az login to log in to the customer tenant.
19) Run the following command to deploy the template into the customer tenant:
a. az deployment sub create –name <NAME OF DEPLOYMENT> –location <AZURE REGION> –template-file <PATH TO TEMPLATE FILE, EXAMPLE: /home/azure/delegatedResourceManagement.json> –parameters <PATH TO TEMPLATE PARAMETERS FILE, EXAMPLE: /home/azure/delegatedResourceManagement.parameters.json> –verbose
20) Confirm successful onboarding by checking the Service Providers service in the customer’s Azure portal and the My customers service in the service provider’s Azure portal.

Great article, this article clearly explains about azure cloud migration services. Thanks for sharing such an informative blog.
LikeLike