
Bare-Metal Restoration (BMR) to the cloud is still a cumbersome process; especially when the cloud provider doesn’t provide a traditional boot USB/CD-ROM to start the recovery. If your Disaster Recovery requirements dictate a BMR strategy, then you will probably be shopping for a Third Party product, or working on testing and documenting a long and complicated process. If you are a Veeam customer or using Veeam products, you will find that the process to restore to Azure, for example, is simple; you backup the workload from Azure using the Veeam backup agent to an on-premises server, or to Azure Veeam backup server (installed on Azure for Backup repository only). When needed, with a few clicks you will be able to restore your backup to an Azure VM. To read and learn more about this capability, read my article Direct restore to Azure on Veeam Blog.
The Use Case
Consider though, if you are using AWS EC2. With the coming Veeam Agent for Windows and Linux, many Veeam customers and Veeam users are asking to restore the Veeam agent back to AWS EC2. There is a short answer and a long answer. The short answer is, restoring the Volume data or files back to EC2 is simple, and it is an integrated process with the Veeam product. If on the other hand, you are seeking a BMR recovery, then you need to convert VMDK/VHD files to AWS AMI, and then using S3, etc., etc.
Now, don’t stress, I’ve done some of the work for you. On this blog, I will take you through the simplest way to restore the EC2 back to AWS, or restored Locally (on-premises). Please note, that this is my opinion that this is the simplest way; you are welcome to share other ways at the bottom of the blog, we can all learn from each other.
Before we start, let’s examine the following scenario. A customer is running a single EC2 workload on AWS, and the customer wishes to protect the EC2 using Veeam agent for Windows to protect the data. In the event of a complete disaster or corruption of the EC2, the customer will want to restore the entire EC2. I took this example from a real Veeam customer, a pilot school where I deployed EC2 workload on AWS for the pilots to access their time and duty application. Many of the pilots are often traveling; they need access to the time and duty app to ensure they don’t exceed the allowed time and duty for each day, month and year. This EC2 workload becomes very important to the pilots, and especially so when the time and duty hours are also monitored by the aviation regulation authorities.
Products used
To achieve the same outcome as the scenario described above, I used the following Veeam products:
- Veeam Cloud connect installed on my Lab
- Veeam Agent for Windows installed on EC2
- An on-premises vCentre
How it Works
First, let us define what BMR means; BMR means restoring the server or workstation to a working state after a catastrophic failure. This will be by reformatting and installing the operating system, with all its applications and its data, back to the state it was before the failure. (The exact state may depend upon the RPO).
Note: Before continuing, if you have not read my previous article titled AWS Management Portal for vCentre, I recommend that you read that before you continue reading as we are going to use this product to migrate the EC2 VM back to AWS.
As was mentioned previously, there are several ways to restore a VM running on AWS; however, I think the easiest and fastest way is to use AWS Management Portal for vCentre. That means you don’t have to go through the complex steps of restoring, converting to AMI, uploading to S3, then attaching… etc.; the AWS Management portal will automate the entire process for you.
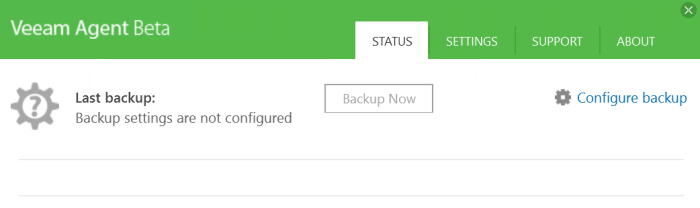
First, backup the EC2 to Veeam Cloud Connect. That is the first step after installing the Veeam Agent for Windows on the EC2 VM. Follow these steps below.
After installation configures the backup
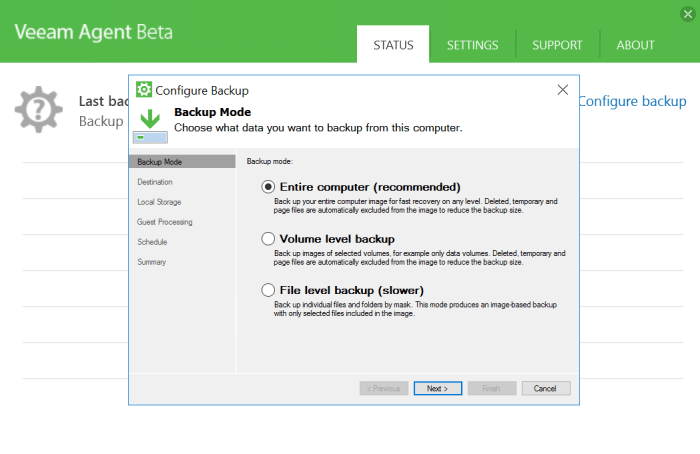
Select the Backup Mode. In this example, we will use an Entire computer or Bare-Metal backup.
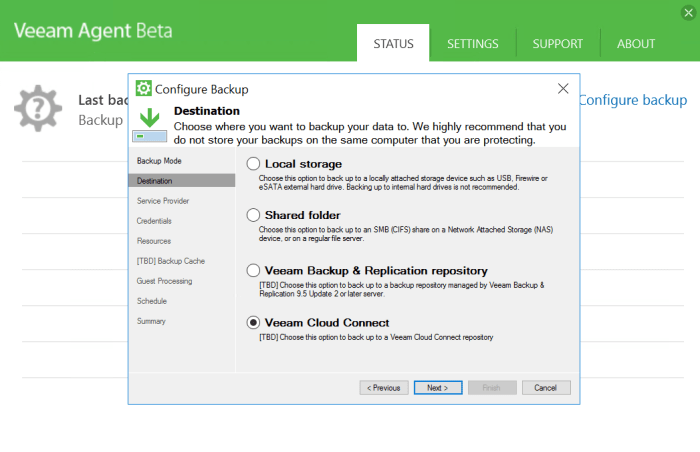
Select Veeam Cloud Connect as your destination.
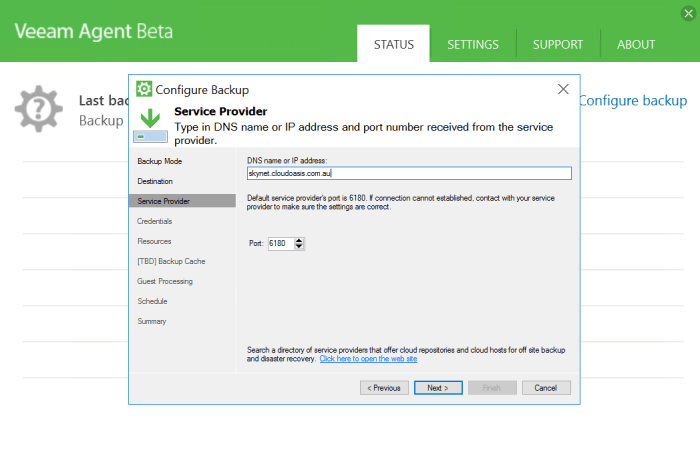
Next, provide the Veeam Cloud connect DNS name or IP address.
Next, provide the Username and Password of your service provider. If you don’t have them, see your system administrator.
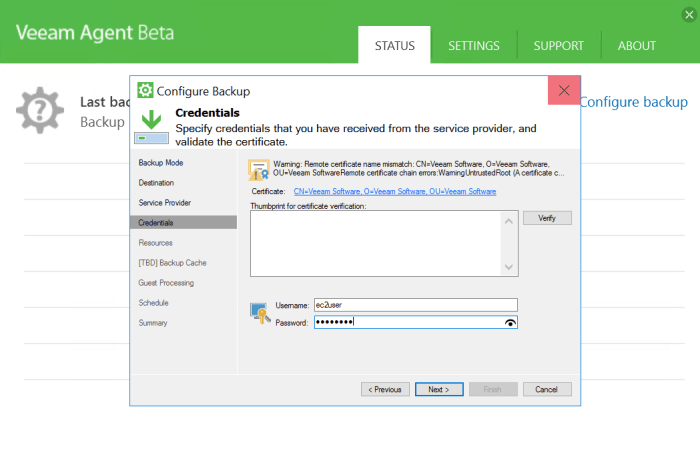
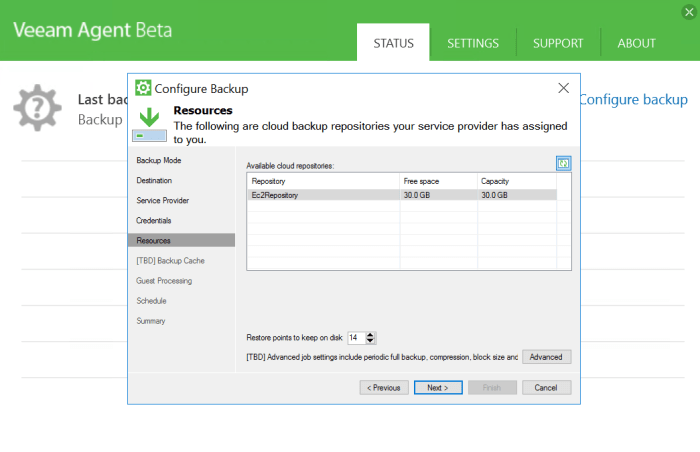
After you have authenticated, you will be able to see the destination, or Available cloud repository configuration assigned to you:
Continuing the Configure Backup, setup the schedule. Here, we have ticked the checkbox for Run the job automatically, radio button for Daily, retries at Automatic after 3 times and at 10 minutes intervals.

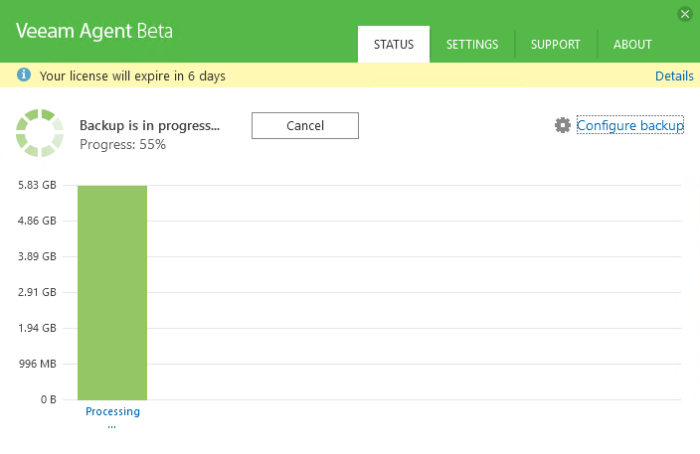
On completing the setup, if you need not wait for the schedule setting to start; you can can chose to run the backup immediately by selecting the check box “Run the job when i click Finish”. The Veeam Agent for Windows will start backing up to the Veeam Cloud connect repository. See the Agent status shown below.
Restore the EC2
The restore process consists of three steps. They are:
- Restore the EC2 from Veeam backup to a VMDK
- Attach the VMDK to a VM on vCentre
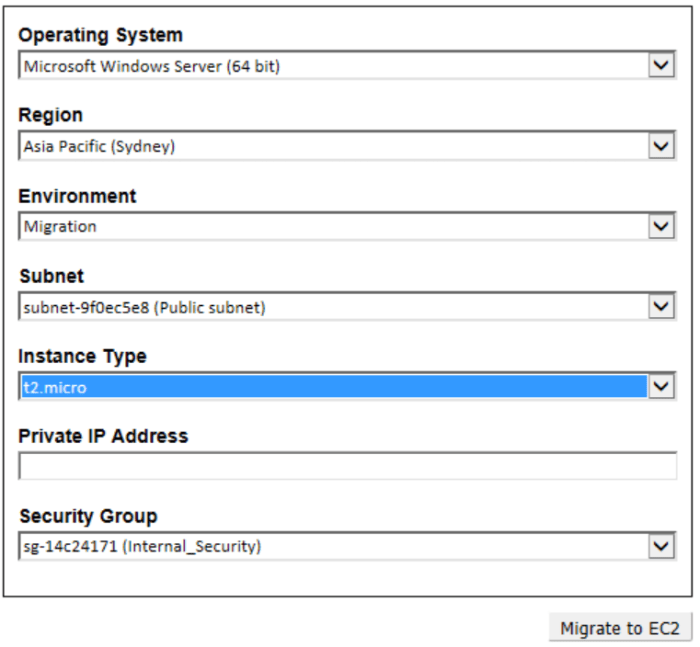
- Migrate to EC2 from vCentre using AWS Management Portal
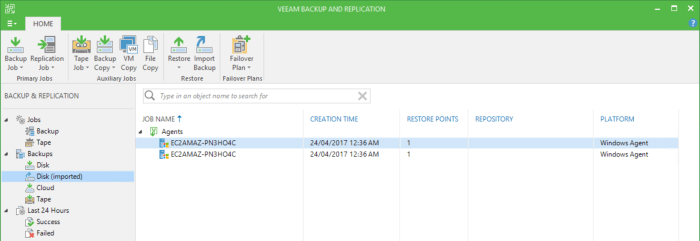
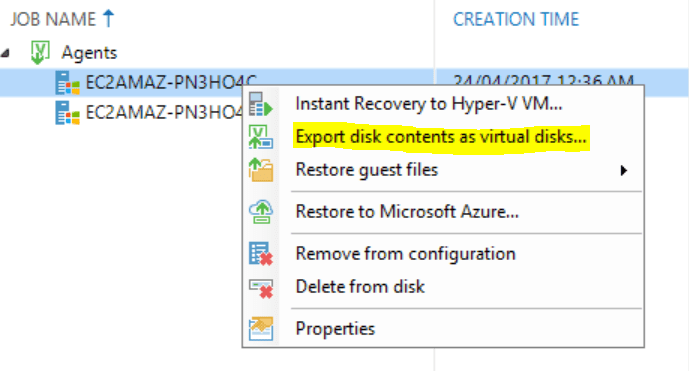
To begin a restoration, open the Veeam Backup and Replication console. Import the backup from the repository; this process can be automated by using PowerShell to predictably scan the repository to import the new backup points using the Import-VBRBackup command. From the tree view, click on Disk (imported), browse the Agents, and then choose the desired backup point to restore.
After you have identified the restore point, right click and chose Export disk contents as virtual disks…
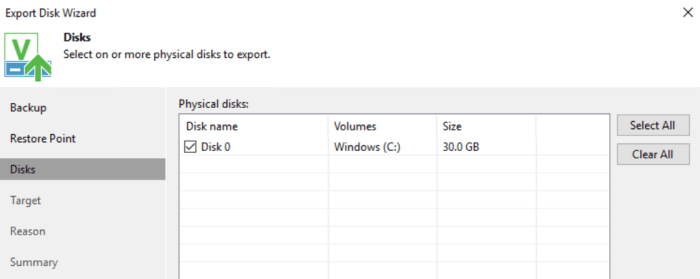
The next step is to chose the disk for restoration.
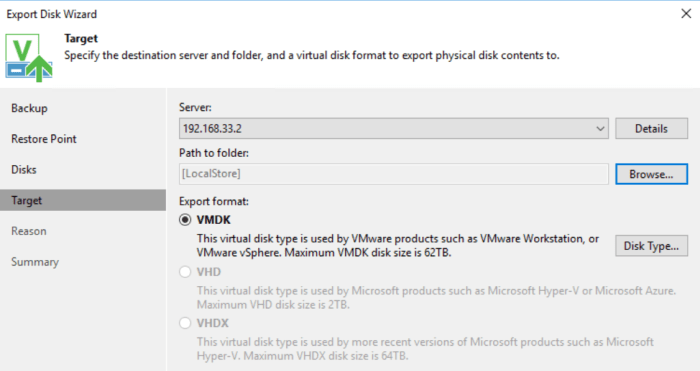
In this example, the destination chosen for restoration is an ESXi host, and the path/folder is a datastore.
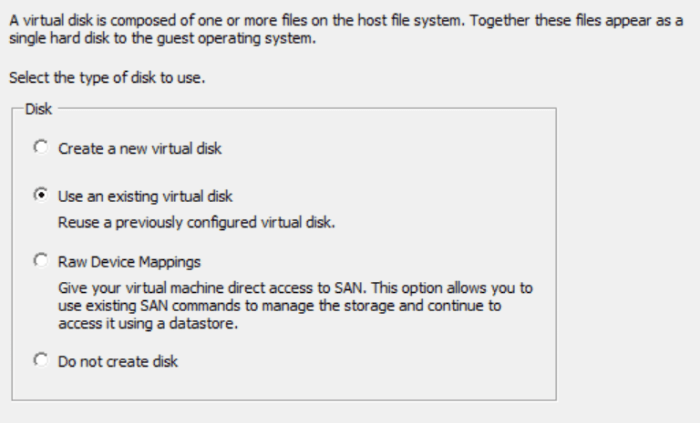
After the restoration is completed, you will have to create a temporary VM on your vCentre, and then attach the VMDK.
Note: It is not necessary to power the VM. This means you can chose any hardware configuration you wish.
Using vCentre to Restore back to EC2
After creating the VM, you are ready to right click and choose to Migrate to EC2. (See the yellow highlight in the figure below.)
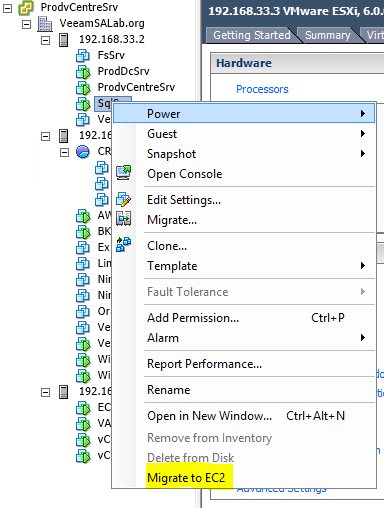
On completing the migration, the Migration State will show completed.

The migration also includes a conversion to EC2 from VMDK; you will find that your VM has restored back to AWS under EC2.
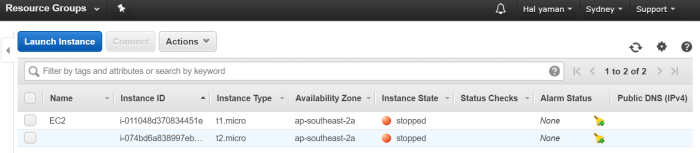
On the above screenshot, the second VM is the one we restored. You can see I had the option of changing the Instant type. This can be adjusted during the migration.
Conclusion
At the end of this process, you will have noticed that the process to restore the EC2 back to AWS has many stages and is time consuming; it is not entirely suitable for critical workloads. What it does give you is a workaround to get your EC2 up and running should you find that you have a complete disaster or corruption.
I have introduced you to some of the capabilities of the new Veeam Agent for Windows; such as, backup to Veeam Cloud Connect. This is a subject I will blog about it in the coming blogs. Until then, I hope you find this blog informative. Please share it if think it will help someone else with this, or a similar problem.
Hope you find it informative and please share to reach more readers.
