
To secure your data, you are probably using data encryption and data encryption keys on each set of your data. This method of data encryption can be simplified by using centralised encryption keys offered by Azure Key Vault. Let’s learn how to set it up, and how long it takes.
In my previous blog posts, I discussed the new Veeam Backup for Microsoft Azure version 3, where I highlighted several new features. This week, I want to take you through one of the new features that many customers are excited about. This new feature is data encryption of your backup data using the Azure Key Vault.
Why the excitement?
Many companies find themselves managing several encryption keys to their different data sets when securing their data. When it comes to backup data encryption, Veeam software offers a “Password Encryption” method based on SHA-256; but, this password encryption can become complex to manage if you are managing multi backup repositories.
So, what is your alternative? A centralised management of encryption keys and their secrets is a much better approach; this is what Veeam has added in the latest Veeam Backup for Azure. To make this newly arrived feature easy to manage, this VBA product integrates with your current Azure Key Vault, where you are currently storing your company wide keys.
What is Azure Key Vault?
Azure Key Vault is a cloud service for securely storing and accessing secrets. A secret is anything that you want to tightly control access to, such as API keys, passwords, certificates, or cryptographic keys.
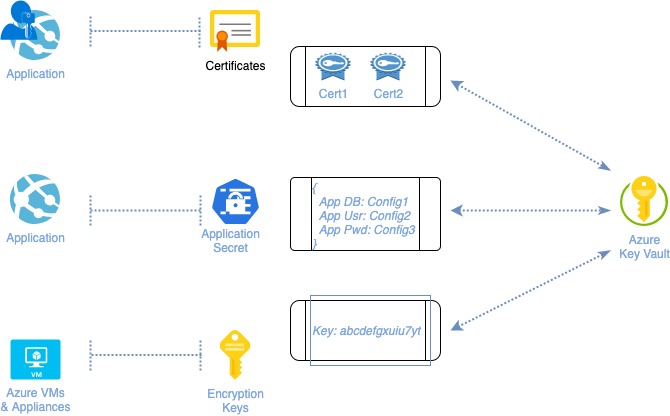
Azure Key Vault is used for storing several type of keys:
- Secret Keys
- Certificates
- Application secrets
Each key type has a specific use; but all key types share the Azure Key Vault as a secure place to store your keys, certificates and secrets. The diagram below summaries these three key types:
To learn more about Azure Key Vault, follow the link for more in depth reading, Azure Key Vault basic concepts
How to Set it up?
Setting up the Azure Key Vault is a simple process. It starts at browsing to the Azure Key Vault, then press Create:

You add in the necessary details for your new Key Vault; such as name, resource group, region, and so on.
Next, we assign permissions to allow Veeam VBA to access and read the keys we will put in the vault:

At the Network entries, I will keep the default configuration.
Note: Leaving the network as default is acceptable for the blog demo; it is likely that you will restrict access to be from the VBA network only.
Then press Next to create the key vault.
Now, lets move on to creating a key that we can use for our Veeam VBA encryption demo:
- Browse to the Key Vault we have just created – Keys
- Click on Generate. Now, provide the key name; keep all the other details as their defaults and create the key

Now, we are ready to use this key to encrypt the Veeam VBA Backups. I will run through this process in the next section.
Integrate with Veeam Backup for Azure
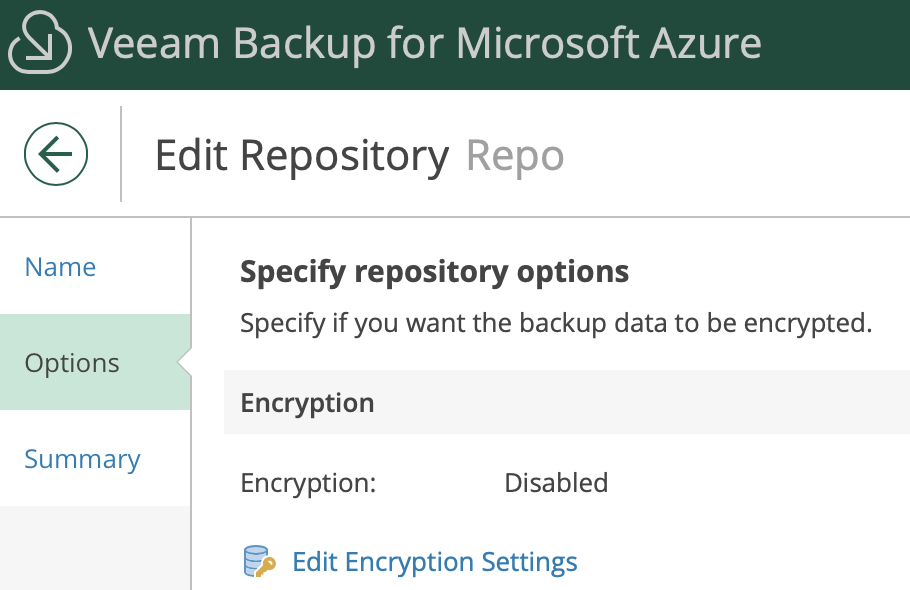
Following on from the steps above, browse to the VBA Configurations option and choose Repositories. Select the repository you wish to encrypt, then and browse to Options – Encryption:
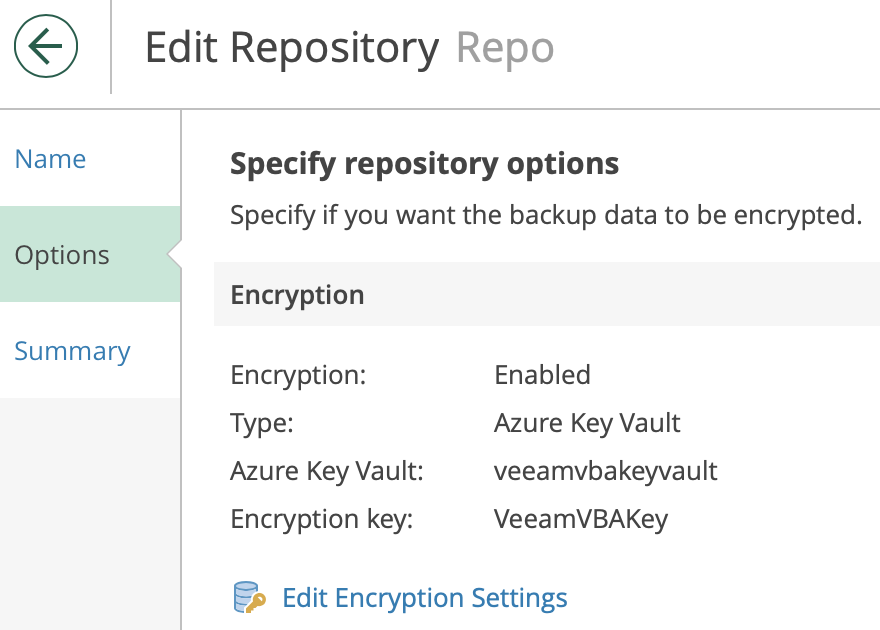
Next, enable the encryption and select Use Azure Key Vault encryption key, and choose the new Key:

Apply and save.
Summary
Organizations adopting cloud strategies have a preference for centralising the management of their encryption keys. As we saw demonstrated on this blog post, Veeam software enables Azure Key Vault integration to helps in securing the the organisation’s backups. In the event of the loss of the Veeam backup appliance, or on migration of the repository to another Backup appliance, all that is needed to decrypt the backup data is to connect to the Key Vault to start reading and recovering your data. This is a welcome feature, and more importantly, it is easy to use.
