
Have you ever wondered how you might deploy Microsoft Azure Backup to protect your Azure Virtual Machine? You would like to get started, but remain a little hesitant because there are so many options available? Or you believe your Azure workload doesn’t require backup?
On this blog post, I will take you through the steps you must follow to set up your Azure Backup to protect your Azure Virtual Machines. But before we get started, let’s answer the question: “Do our Azure VMs require a backup, or are they immune to data loss?”
I’m sure you have heard about ransomware attacks, viruses, and more, that all lead to data loss and workload outage. If you are running your production workload on the Microsoft Azure cloud, you are not immune from malicious attacks that lead to data loss. But the good news is that Microsoft Azure provides an integrated solution to protect you from such data loss and disasters; it is called Azure Backup, or Recovery Services.
Now, how do you get started? Simply follow the instructions on this blog, and can I assure you that at the end of this blog post, you will be able to protect your Azure Virtual Machine, and recover it too, if you have to.
Adding a Recovery Services Vault
To start setting up, we run Azure Recovery Services Vault from the Azure Services, as shown in this screenshot:

The Recovery Service vaults is a Microsoft Azure storage identity which houses a copy of data, or configuration information for virtual machines (VMs), workloads, servers, or workstations.
To get started with Azure Backup, we must configure Recovery Services Vaults.
To start the process, you must press the Add option to configure the first Vault:

The following configuration screen appears when you click on Add. This is where you enter your project details. The details required are Subscription, Resource Group, Vault name and the Region where you are going to deploy the vault:

Press Create after all the details have been entered.
Note: Before we start our Recovery Vault configuration, it is important that your vault is deployed in the same region as your Virtual Machine. You must also use the same subscription, important if you have several subscriptions.
Configuring your Recovery Services Vaults
After completing the steps up to here, you click on your new Recovery Vault to start your configuration.

As you can see, there are lots of options that you can select to configure and customize your vault. In this blog post, I will focus on only three options:
-
- Properties,
- Backup Policies, and
- Backup.
Those three options will get you started with Azure Backup, and be the cornerstones of future blog posts on the same topic.
Properties
From the Properties tab configuration, you can set up your Backup configuration, Security setting, Security PIN and more. Here we are interested in the Backup configuration; this is where you can select your storage replication type. You can choose between the default Geo-Redundant, and Locally-redundant. It is important to configure the storage replication at this point; this configuration cannot be changed after you start your first backup.
Note: Gro-Redundant storage costs twice the price of Locally-redundant storage. You can read more about costs at the pricing link: https://azure.microsoft.com/en-au/pricing/details/backup/
For our setup in this exercise, I have chosen Locally-redundant:

Backup Policies
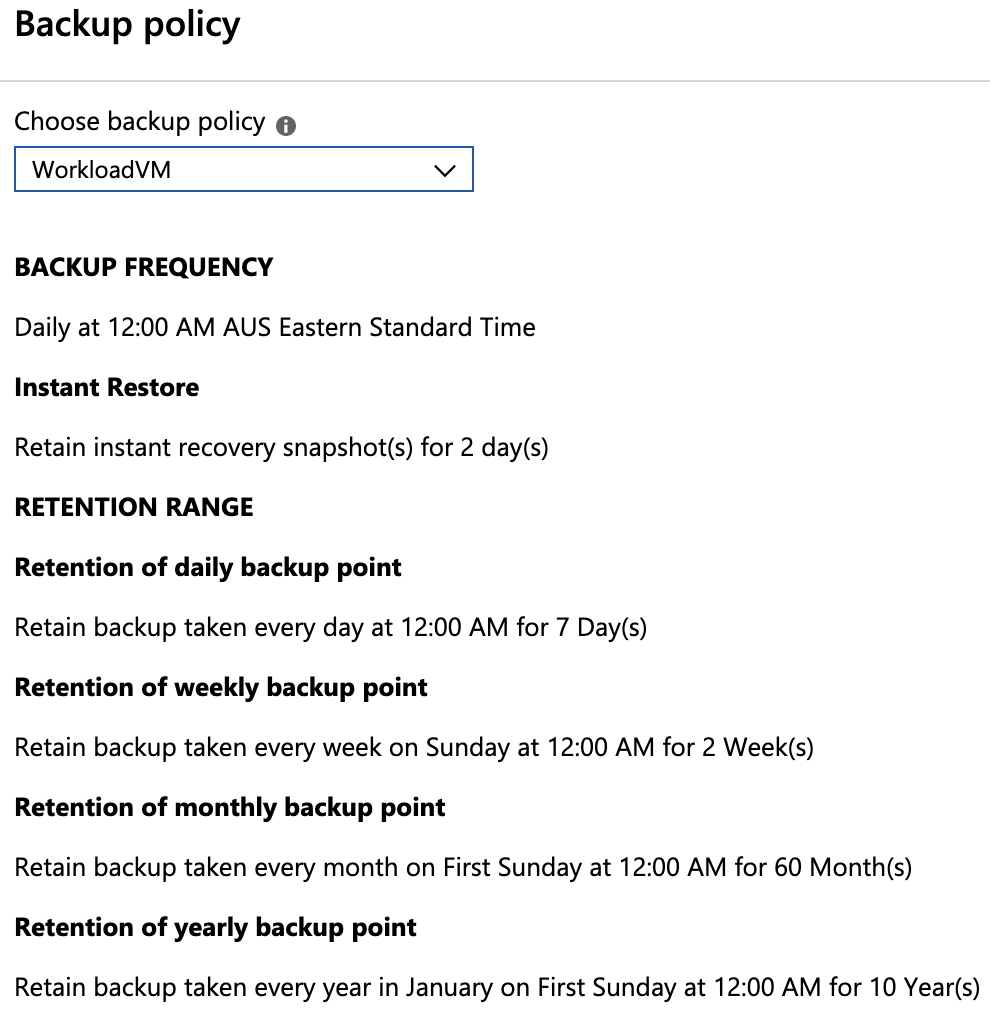
At the left menu, Management section, you can manage your Backup policies. After creating your Recovery Vault, you have two default polices; one for SQL and one for Azure VM. You can also create your own policy by pressing Add. This opens a screen similar to the screenshot below. From the policy types available, i.e., Azure Virtual Machine, Azure File Share or SQL Server in Azure VM, we will create a policy for Azure Virtual Machine.:

As you can see, the policy configuration and retention period is selectable; you must choose the best setting for your organization. On the screenshot above, I have changed the backup schedule, instant restore and retention range to create a simple schedule.
Virtual Machine Backup Config
Finally, we have arrived at the part where we will assign the policy to a Virtual Machine, and then start our first backup. To assign policies, browse to the Backup option and then select Azure VM as a workload. See the figure below:
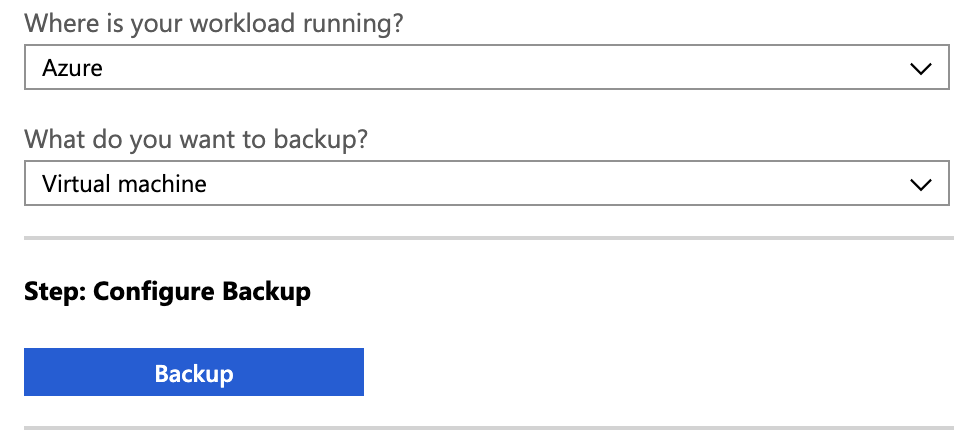
At the Configure Backup step, press the Backup button to choose the VMs you want to protect. The next screen takes you to the Backup policies; here, choose the policy we have just created:
Next, press OK. The next screen is where you select the VM to assign the Backup policy:
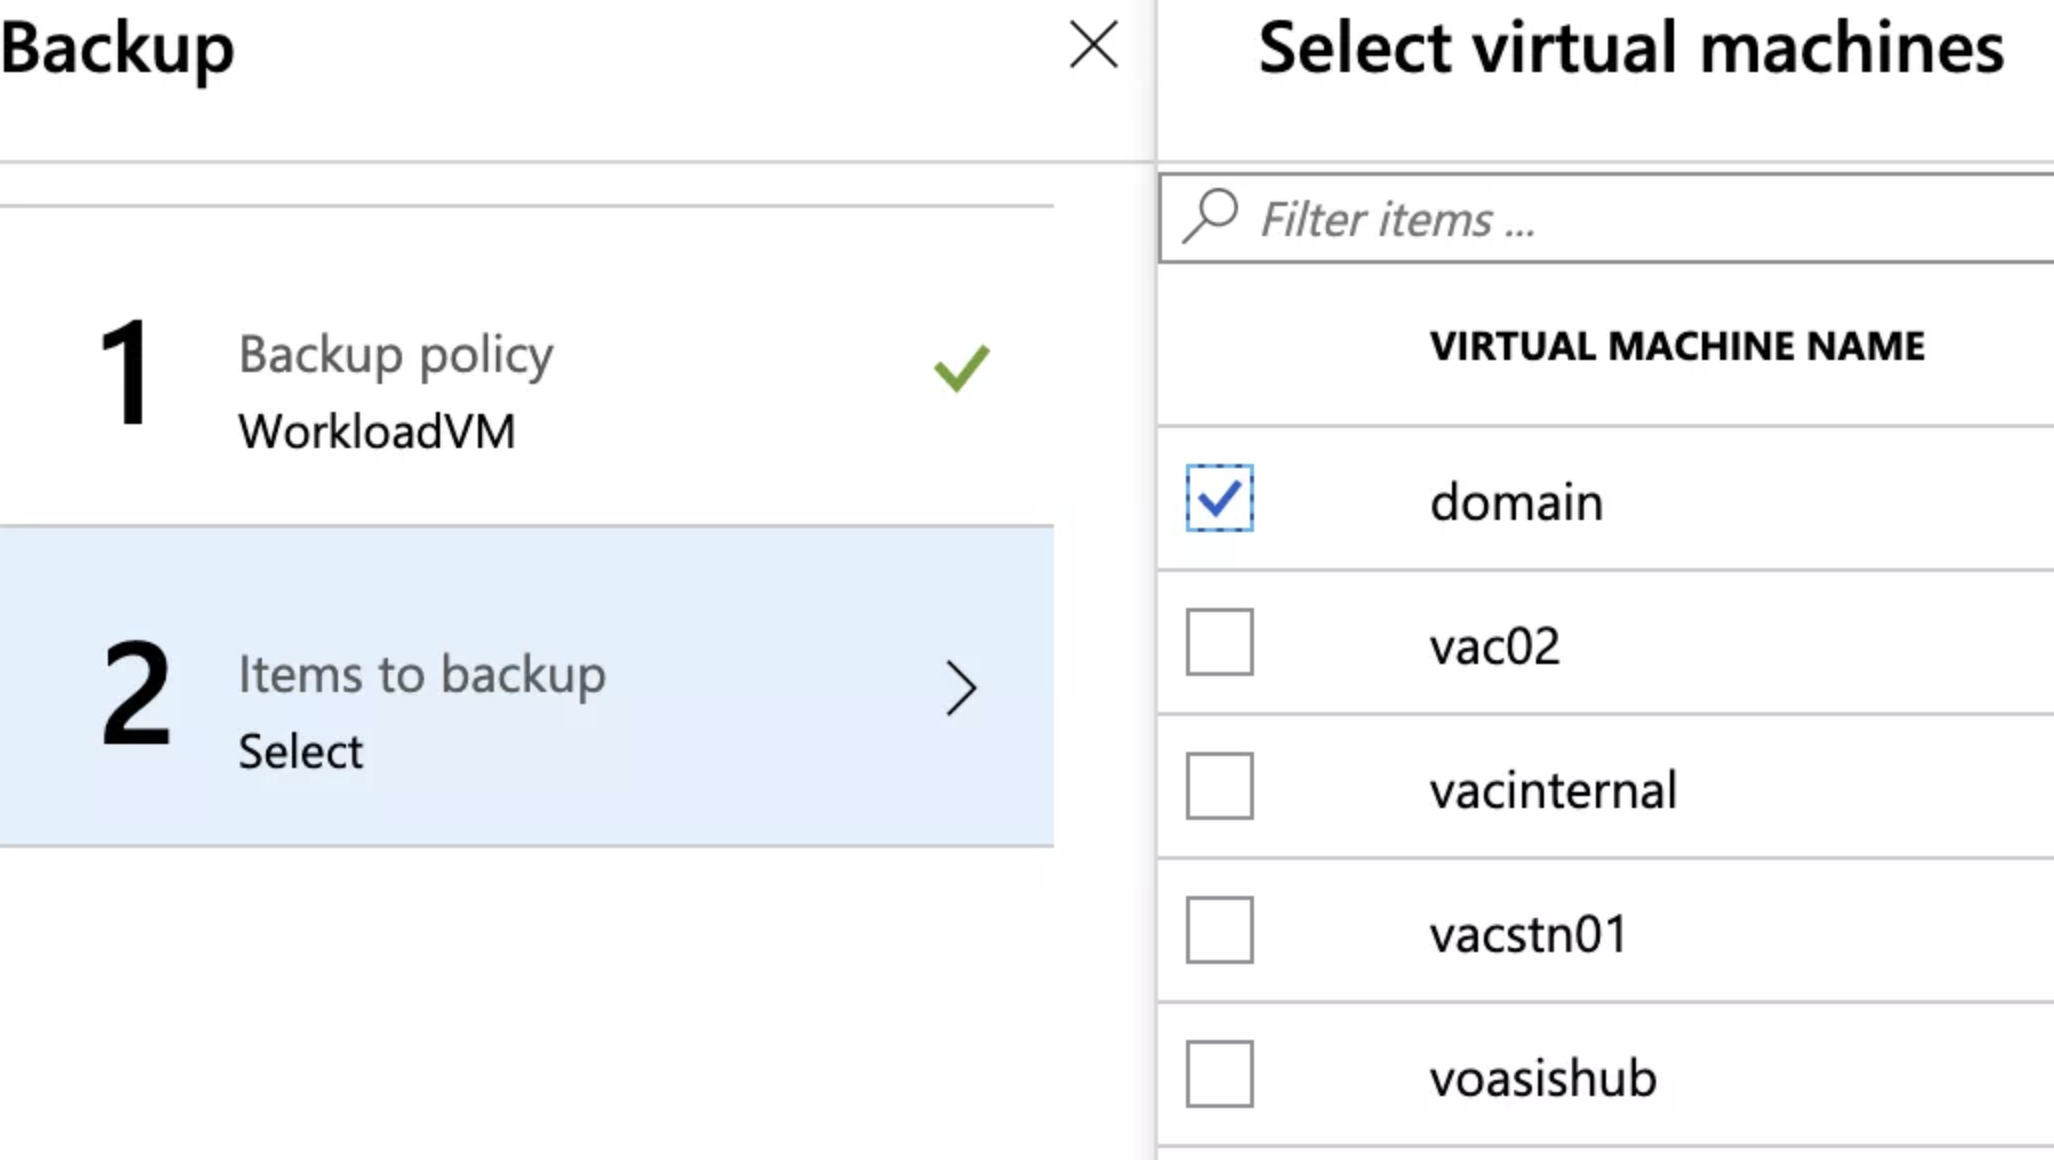
Next, press OK, and then select Enable Backup.
The previous steps assign the Backup policy to the VM(s). To back up the VM(s), you must wait until the time you configured in your policy to start (in our case, it starts at 3 am). Alternately, you can start the initial backup by browsing to Backup Items, then click on Azure Virtual Machine and the machine name to manually start the initial backup:
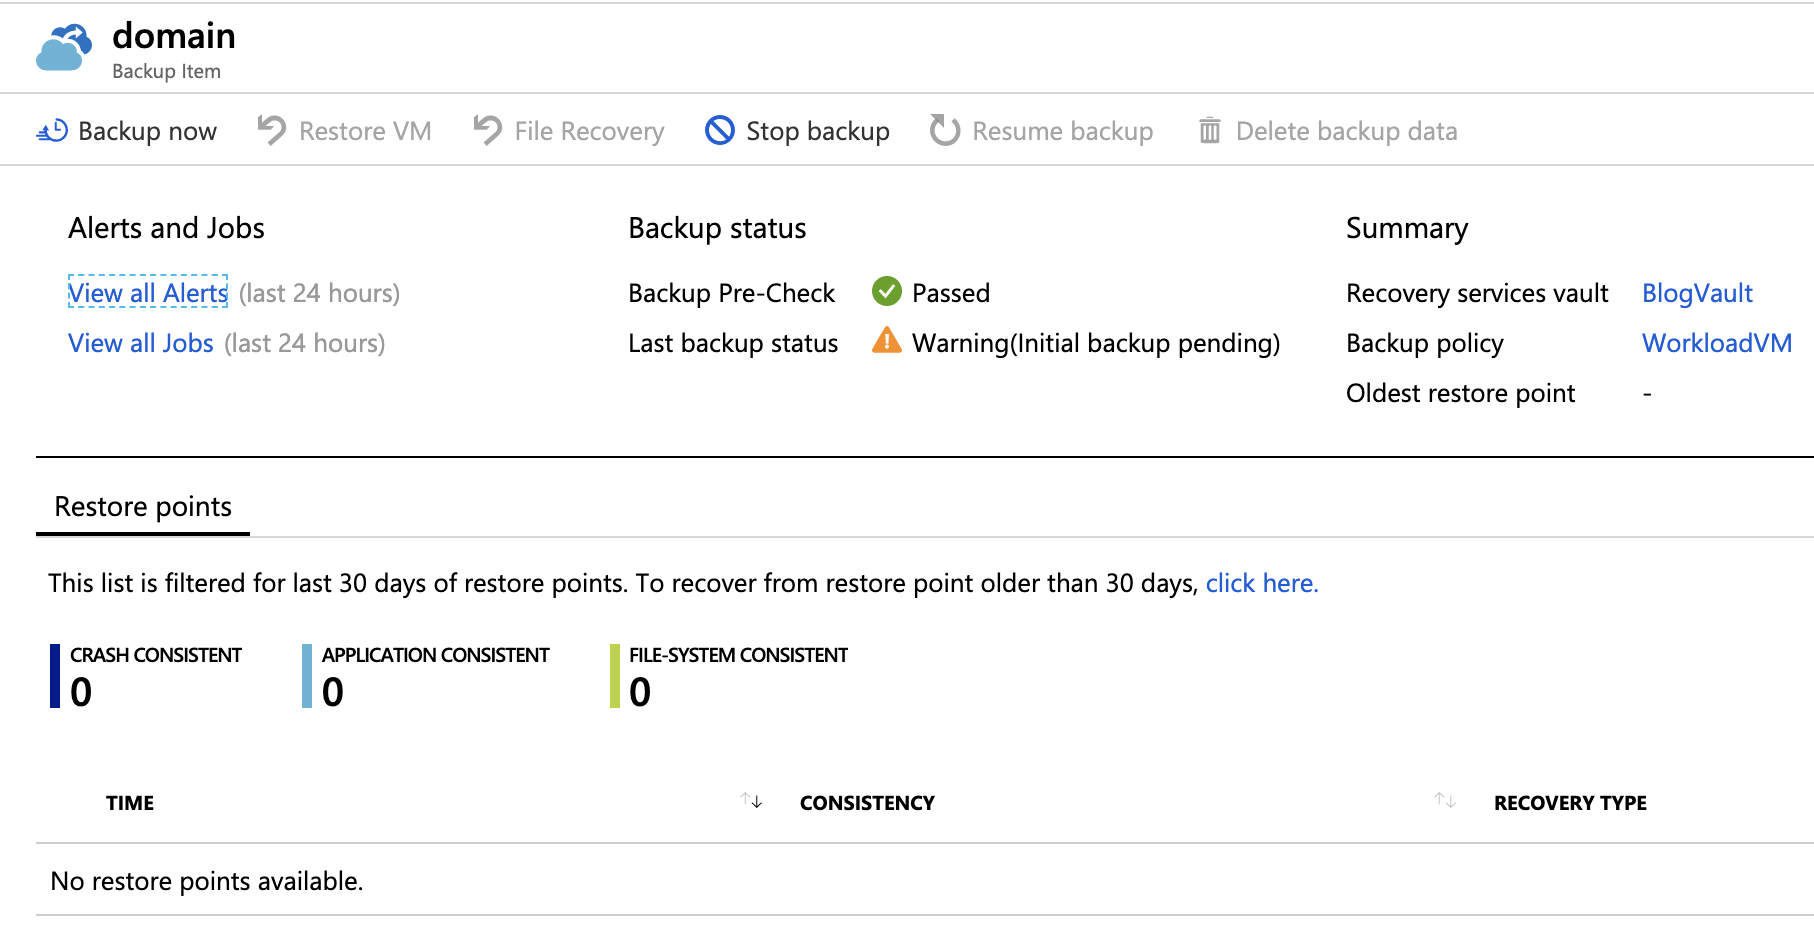
Next, press on Backup at the top left corner.
Recovery
Now, after we have successfully backed up up the selected Azure VM, let’s take a look at the recovery options. We can start by recovering a file from the VM.
Azure File Recovery
Let’s consider the following scenario; after backing up your VM, you lost several files. Now you want to recover them and you believe that the files are available in your latest backup. Follow these steps to recover the files from your backup:
From Backup Items, choose the VMs you wish to recover the files from and press

On the File Recover screen, select the recovery point you wish to recover from, then click on Download Ex. Copy the file to the VM where you wish to recover the file to:

The executable file will extract a PowerShell. This helps you mount the recovery point as a local drive on the machine you run the script on. You are required to use the Password generated for you during the mounting process.

This screenshot shows that the execution has run successfully:

In the final part of your files recovery, you will browse the backup available on drives E: and F: and copy the desired files to your recovery folder or directory.
After you have saved your files, go back to Azure File Recovery to unmount the disk:

Note: File Recover is limited to recovering files of less than 10 GB; with a recovery speed of 1GB/H you will have to consider recovering the entire VM to recover larger files.
Restore VM
In this scenario, your VM is totally lost or corrupted; you are required to recover the entire VM. To accomplish this, you browse to the same location as with the File recovery; but this time we will choose Restore VM:

After choosing the recovery point, you can decide now if you want to recover the VM as a new VM (Create new), or replace the existing one (Replace existing):
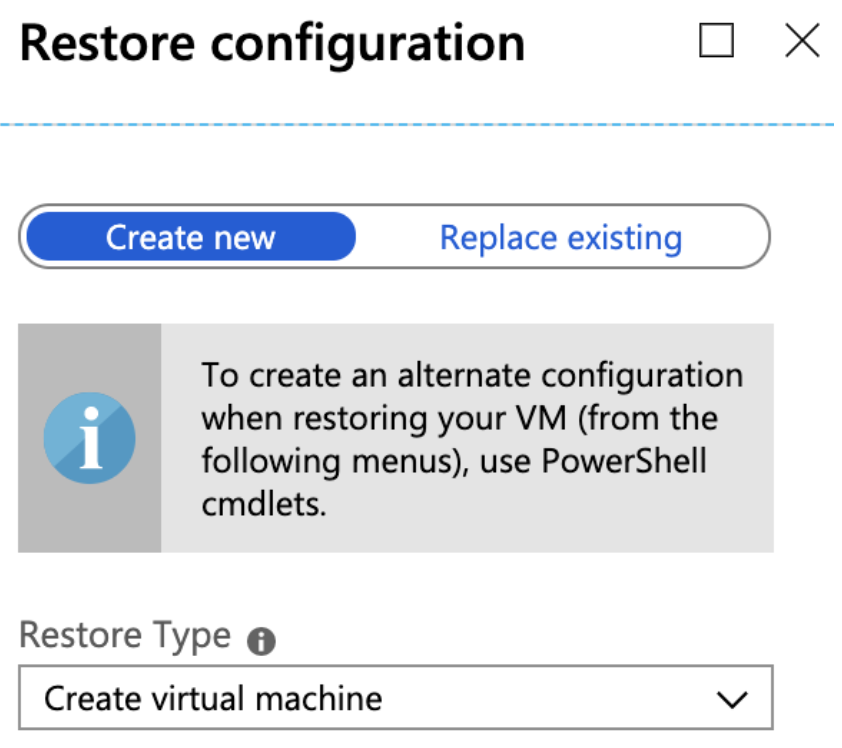
On that example above, I chose to create a new VM with the above configuration. I pressed the OK and then Restore buttons to start the recovery process. After the restore completed, I could log in to the recovered VM and use it as it was before the disaster.
Conclusion
Azure Backup is an integrated Azure Cloud solution and on this blog post, I took you through the deployment and configuration of the Azure backup, in addition to showing you the restore options you will have after backing up. On my next blog post about this topic, I will concentrate on deploying an on-premises server and tier the backup to Azure. Until then, I hope you find this blog informative and please do not hesitate to share.

Looks complicated, use Veeam.
LikeLike