
Deploying VMware NSX-t is a straightforward and simple task, but things can become confusing when it comes to the configuration of the NSX-t environment. In this blog post, I will show you how to simplify the configuration to help you get started.
Note: In this blog post I have not followed best practices in every circumstance. I want to focus on the learning journey. I intended that this post will help you to configure your NSX-t lab where you can start expanding on your learning.
The Environment
To help you follow this article, let’s take a moment to list the infrastructure components that you will be using:
- 1 x ESXi Cluster (1 node) where I will host the NSX-t Manager and Edge
- 1 x ESXi Cluster (2 nodes) used for the compute
- 1 x vDS dedicated for NSX-t with one uplink
- vDS vlan config – Trunk
- Add all the ESXi hosts to the vDS including the management host where the Edge server will be deployed
- 1 x vCenter
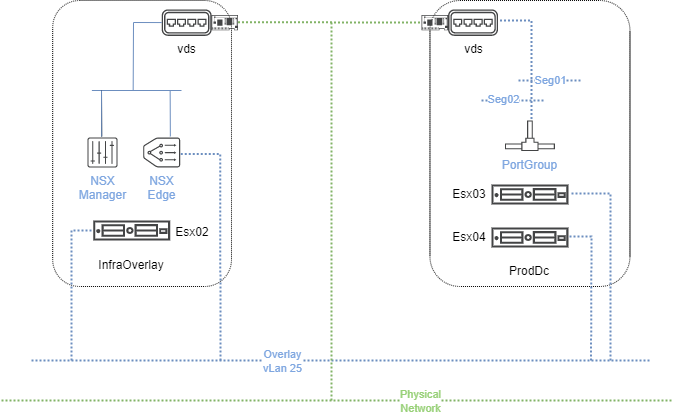
Below an Illustrated diagram showing my lab configuration:
Deploy NSX-t Manager
To get started with the NSX-t, you must deploy the NSX-t Manager. Deploying the NSX-t Manager is a simple task involving a deployment from an OVF file with detailed instruction throughout the deployment; therefore, I will not spend too much time on it. The things you must watch out for are the following:
- I recommend using Google Chrome
- Create a DNS A-record for the NSX-t manager
- At deployment configuration, use “Small”
- Rolename “NSX Manager”
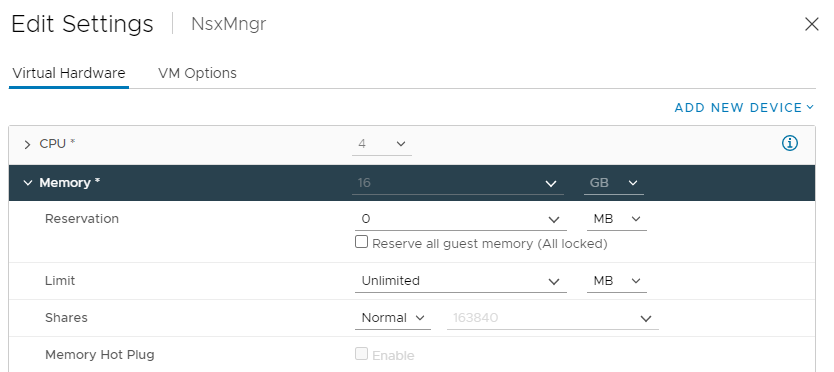
After the deployment has been completed successfully, I recommend adjusting the NSX-t Manage CPU and Memory reservation to 0 to save the compute resources.
Use your browser to access the manager admin interface to start the configuration. The default username is “Admin” and the password is the one you provided when you set up the deployment.
Configuration of the NSX-t environment
At the first login, you must accept the license agreement and then make sure to enter the NSX-t license key before you get started.
To successfully deploy the NSX-t, you must start with the infrastructure preparation where the NSX-t manager will deploy a vib to each of the hosts, and then create a new vmkernel adapter which it will use to communicate with other components and re-route traffic. So, our first task is to create an “IP_Pool” to be assigned to each of the hosts.
To create the IP pool, browse to the “Networking” tab, “IP Address Pools” and press “Add IP Address Pool”:
- use vTep_Pool as a name
- under “subnet” press on “set”
- click on “Add subnet” and choose “IP Ranges”
- IP range:
- 10.33.25.10 – 10.33.25.25
- CDR: 10.33.25.0/24
Save and exit:

Next, browse to “System” and then expand the “Fabric” menu on the left menu; choose “Compute Manager”:
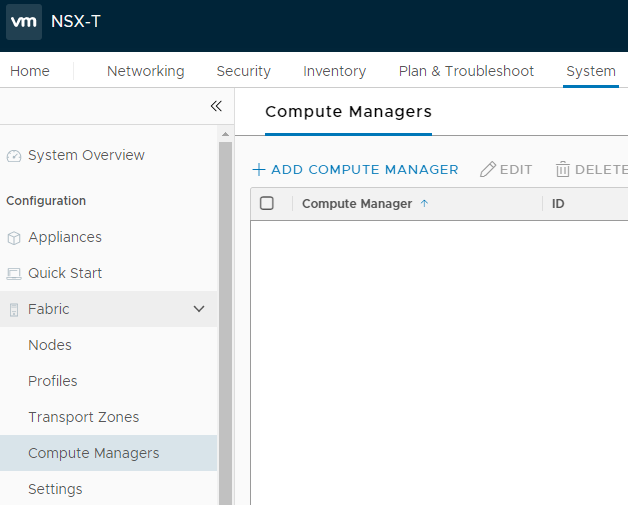
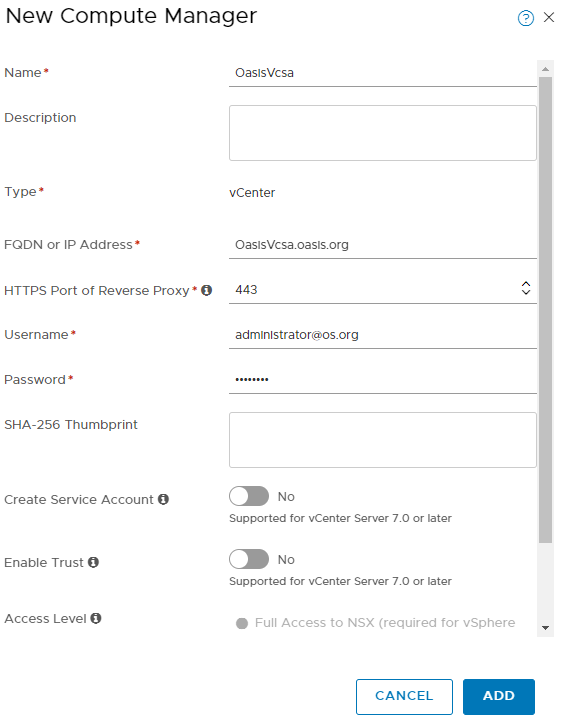
NSX-t Compute Manager refers to the vCenter server, so let’s add the vCenter server using the “Add Compute Manager” option on the top; next, add the information of the vCenter server:
After adding the vCenter, you are ready to start your NSX-t configuration. To make it simple, I break the configuration into smaller steps, as shown below:
- Create a “Transport Zones”, one Overlay and One Vlan
2. Create “Uplink Profile” with a vLan of 25

3. Create a “Transport Node Profile”:
- Use switch VDS
- Attach to the VDS created for the NSX-t or any VDS (switch MTU must be at least 1600)
- Add the two transport zones you created earlier
- Use the Uplink profile created on the previous step
- Use the IP pool
Prepare the Nodes
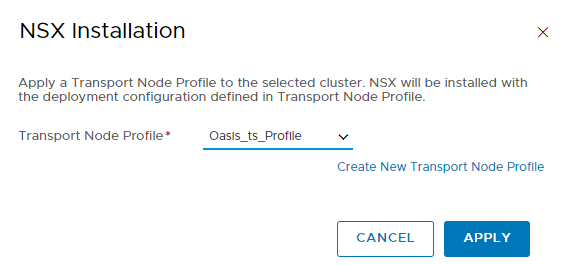
After creating the Zones and profiles, you are ready to prepare the ESXi nodes. To do that, you must browse to the “Host Transport Nodes”, then choose the cluster. Next click on “Configure NSX”,

Next, choose the “Transport Node Profiles” you created at Step 3:
Also, prepare the management cluster where you are going to host the Edge Server,
Deploy NSX-t Edge
After the NSX-t Node preparation from the previous steps has been completed successfully, you are ready to continue with your last steps on this blog post; that is, deploying the NSX-t Edge VM.
So let’s get to it; begin by browsing to “Edge Transport Nodes” under the Nodes menu. Next, click on Add Edge Node. This will open a guided configuration where you must provide the Edge details. See below for the information you must provide:
- The Edge hostname (make sure you create DNS A-record before hand)
- Select “small” as a form factor
- Expand “Advance Resource Reservation” and ensure CPU and Mem reservation set to 0
- Configure deployment, point to the appropriate cluster, VDS and datastore (on my lab I have a separate cluster just to host the Edge and Manager)
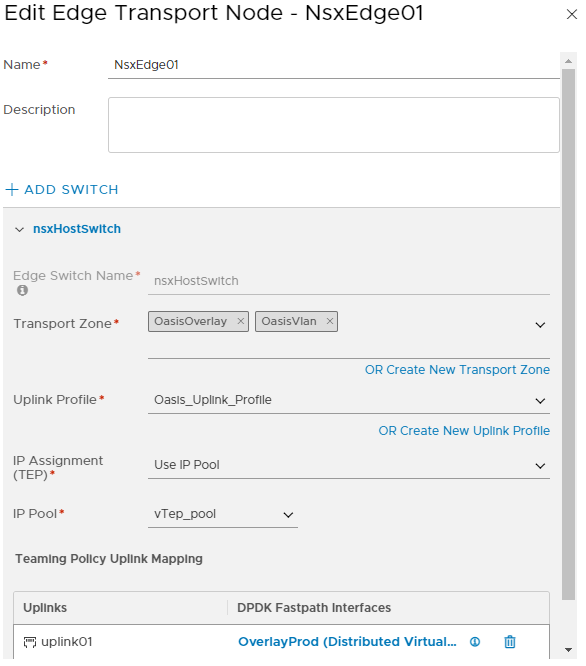
- At the “Configure NSX”
- Provide the Edge switch name”
- Choose the two transport zones created earlier
- Chose the uplink profile created earlier
- Chose the IP_Pool
- Interface attach to the NSX VDS (NSX clusters – where the vib is installed)
Click Finish
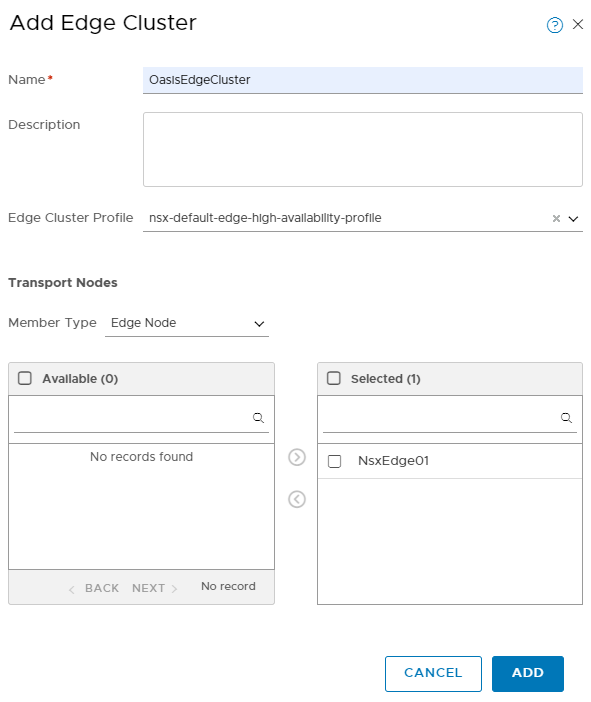
For the final step, let’s create an Edge cluster and add the new deployed Edge to the cluster. Browse to Edge Cluster and press “Add Edge Cluster”, provide a name and then select the Edge VM, as shown on the following screenshot:
Summary
Following the steps in this blog will help you deploy and configure the NSX-t on your lab. As I mentioned at the beginning of this blog post, those instructions are not following best practices at every step; they are intended to help you deploy the NSX-t on your lab to get started on your learning journey. In the next blog post, I will take you through the configuration of T0, T1 and BGP connections, in addition to the routing and segments configuration.
