 vSAN is a great VMware technology; it has become a cornerstone of many VMware offerings, such as VMware on Amazon, and Azure. You can no longer ignore it, and if you still haven’t implemented it on your production environment, maybe it’s a good time now to familiarise yourself with it.
When re-deploying my new lab, I decided to use vSAN instead of centralized ISCSI storage. The main reasons behind this decision are that vSAN becomes the cornerstone of many VMware solutions, such as VMC on Amazon and Azure. I trust the technology and decided that I could benefit from it in my new lab. The second reason is saving on my home power and noise by reducing the amount of equipment I’m running.
To get started with the configuration, let’s examine the basics necessary for configuring the vSAN. To get you started, you need the following:
- At least three servers,
- Each server must contain two local storages,
- At least one storage must be an SSD for cache tier.
On my deployment, I used four Intel NUCs (i7 with 32 GB RAM). Each NUC has one SSHD of 2 TB used as a capacity tier, and one M.2 of 250 GB to be used as a cache tier. In addition, I added a second USB 3.0 NIC adapter to split the Management and vSAN traffic for better performance and management.
If you are using this blog to build your vSAN on a nested environment for testing before deploying on production, and you get a disk error below claiming you don’t have an SSD disk for cache, there is a solution. Read on.

You can configure your hard drive to emulate an SSD. See below:
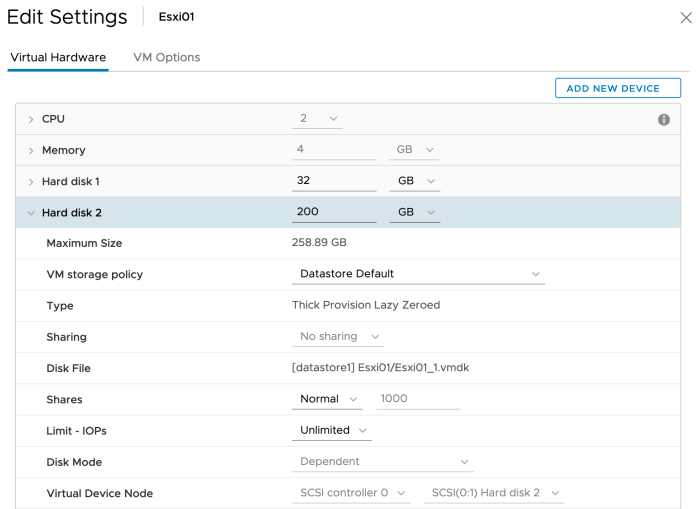
retrieve the Virtual Device Node: ISCSI0:1
Then browse to VM ⇒ Edit Setting ⇒ VM Options ⇒ Advance, and then click on ADD CONFIGURATION PARAMS:

There is another easier way; see the image below, Storage devices. Mark the local VMDK as SSD:

After you have done one of those previous options, you can claim the disk and get started with the config:

Enable the vSAN:
From the cluster top tree, right-click and chose vSAN Config, as follows. You can also browse to configuration ⇒ vSAN, then enable:

Either way will get you to the following guided vSAN configuration. In this example, I will choose the Single Site Cluster configuration type:

Next, you will be able to choose the services. As I don’t use all the SSD disks, I will not be able to enable deduplication and compression. For that reason, I will skip this step and move to the next step:

At the Claim Disks screen, I will assign the Capacity Tier to my SSHD disks, and the Cache tier to my SSD M.2, as you can see below:

The previous image has a blue NEXT button. Click that, and we are finished:

Summary
After all those previous steps are finished, your vSAN is ready to host your workload. You can see the vSAN Overview screen presented below:

You can see that enabling this great technology is very simple and straightforward. So far, I have been using it for several months, and I can tell, its works as expected. There have been some small challenges, one where I lost one of my servers due to a miss configuration on my lab; but as you can see, rebuilding the vSAN is really simple to work.

[…] View Reddit by kavarajo – View Source […]
LikeLike