
Suppose you have a new business requirement to protect your stored business-critical data from modification or deletion. This new business requires that you comply with market data protection standards, or it has a specified legal requirement.
What are your options when you set out to meet this requirement?
Immutable storage for Azure Blob storage is the answer to that introductory question, and we will discuss it in this blog post. I will take you through the basic configuration of an immutable storage blob, and what options are offered when using it.
But first, what does immutable mean? The dictionary meaning of immutable is: “Unchanging over time, or unable to be changed.” Let’s go on now to see what that means when we are talking about Immutable storage for Azure Blob storage.
Definitions
It’s a general purpose v2 blob storage account, enabling you to save your business critical data as objects, and these data are protected from modification or deletion. In other words, immutable storage for Azure Blob storage is a WORM (Write Once, Read Many) storage, much like the CDROM. The protection of these objects is set with a retention interval that is time-based, or has a legal-hold policy applied. These policies are applied to the data in the immutable storage within 30 seconds of writing.
Setting Up
As with many other features of Azure cloud, setting up immutable Azure Storage is a very simple task. Let’s go through the steps:
- Browse to Azure Storage Accounts. Press Add to create a storage account, as shown below: (Important: the Account Kind must be StorageV2)
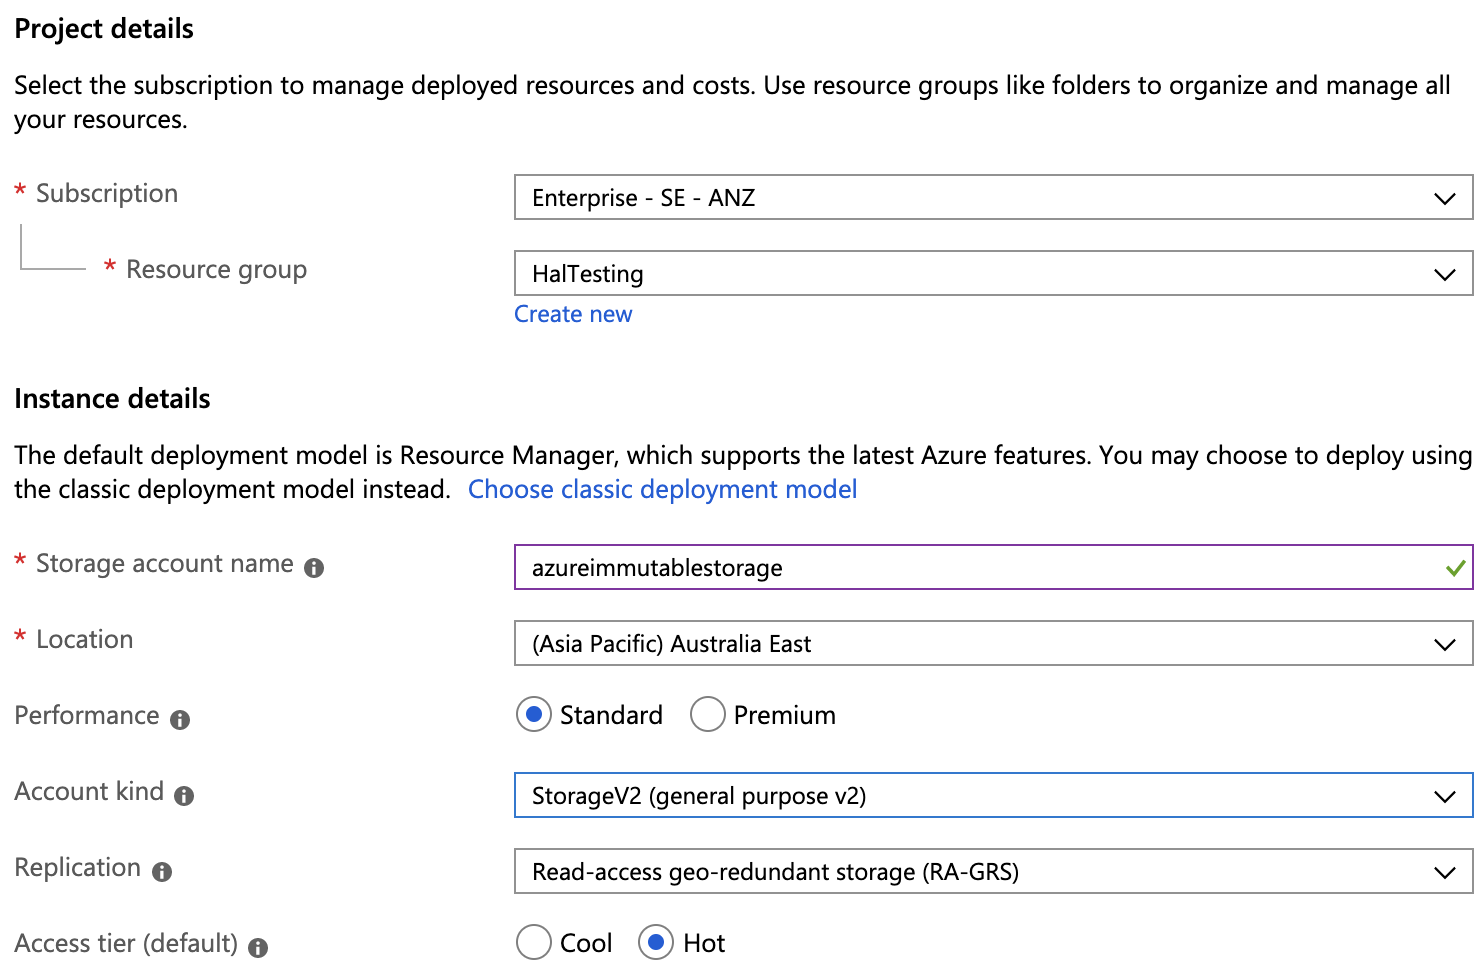
- For the next configuration options screen, accept the defaults, then press Create.
After the storage has been created, the next step is to create a blob container.
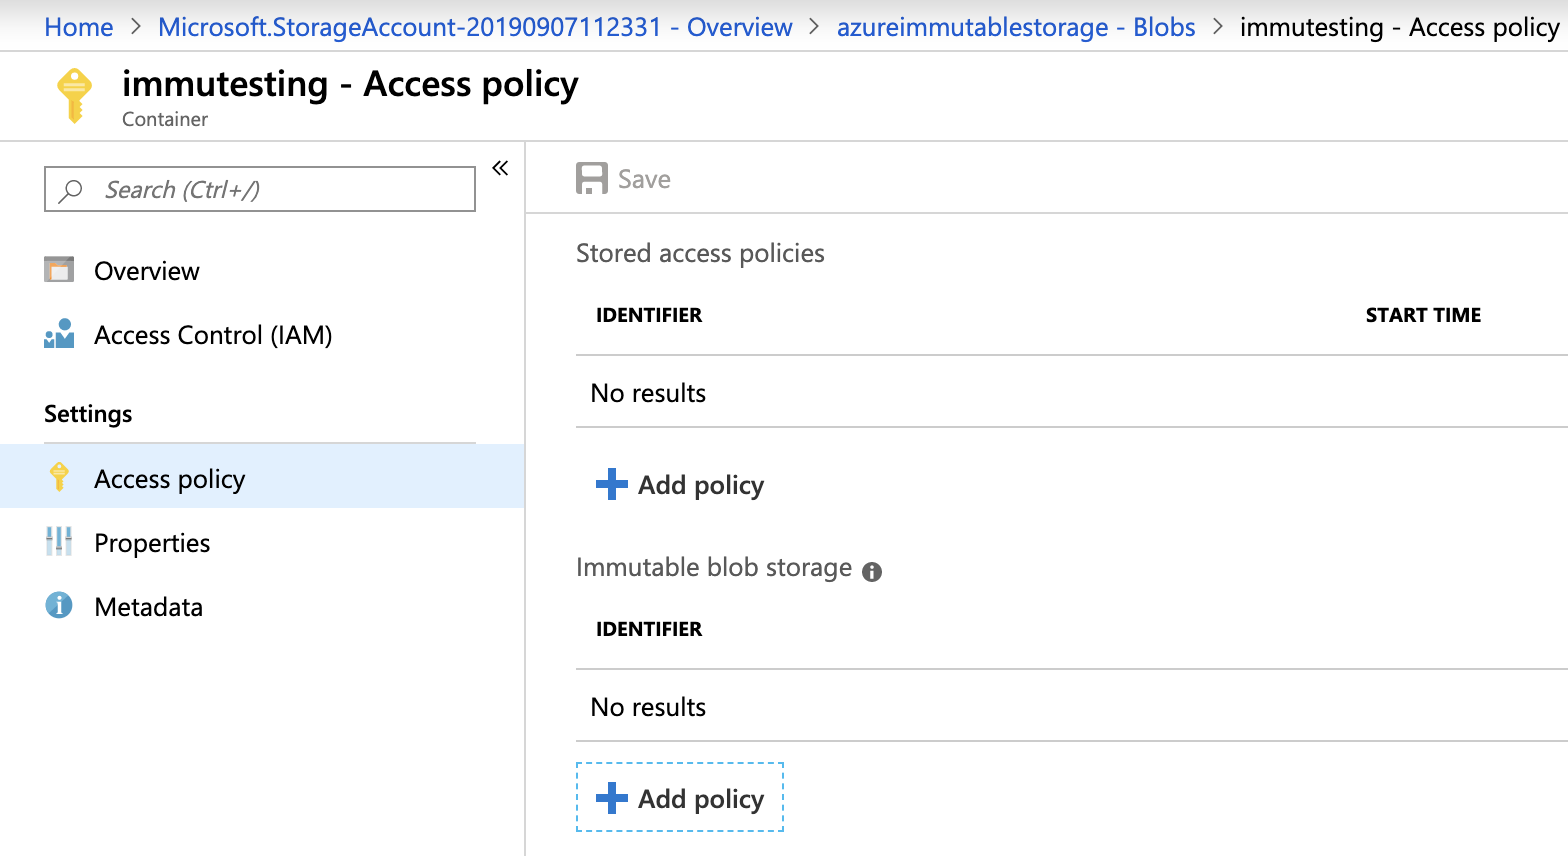
- On the container property choose Access policy. At the IDENTIFIER, press Add policy:
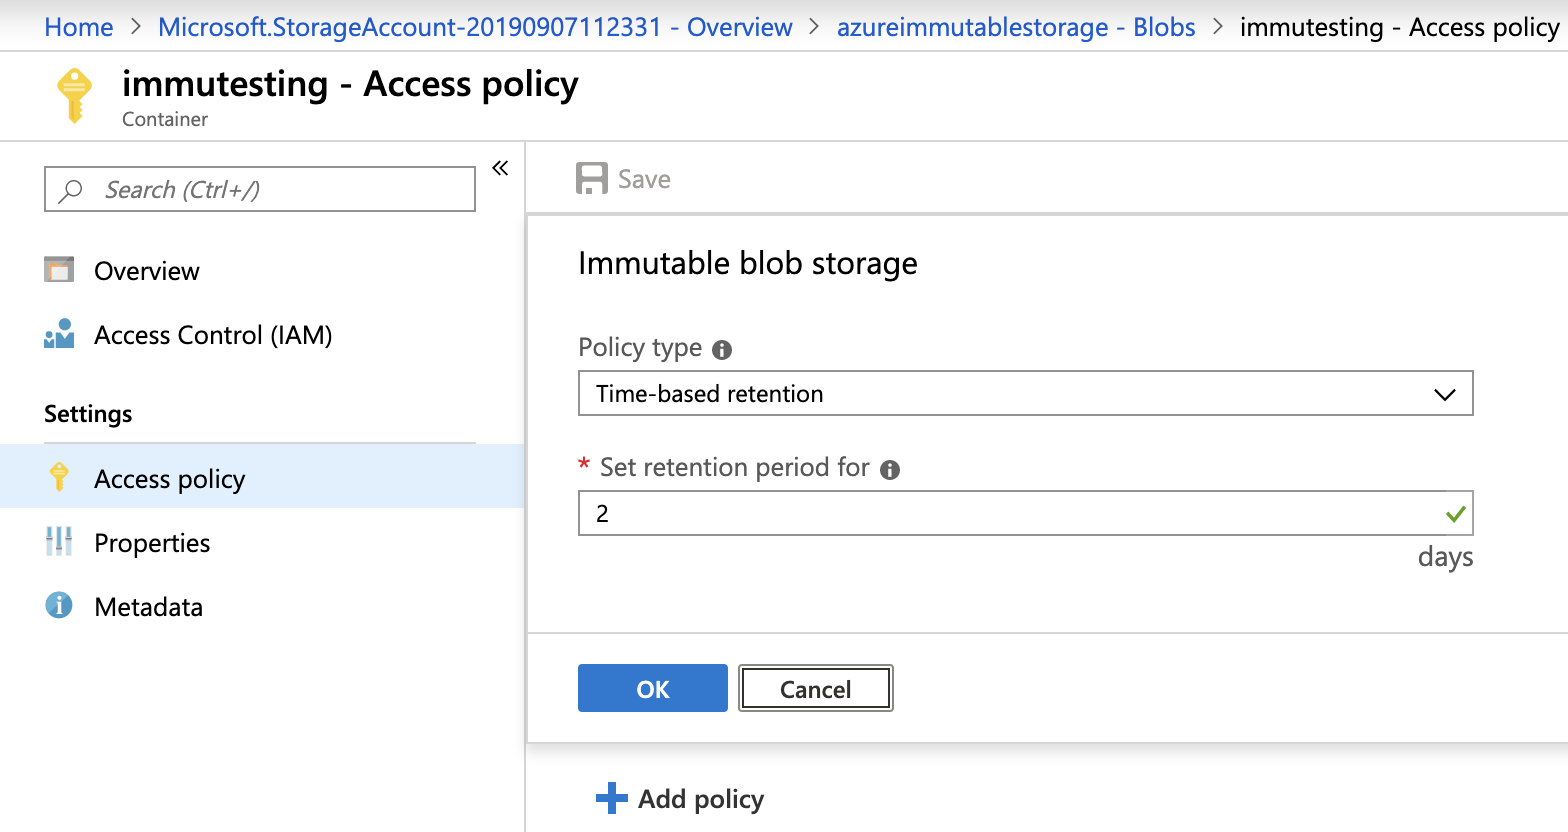
- I will choose the configuration shown below for this demonstration; we are setting Time-based retention with a two days retention period:
Configuring Your Container
After you press the blue OK button, your new immutable container will be set up. You can modify the retention period, and also delete the container.
Wait! So what is the value of this container if you can delete it? Well, you can delete the container and set it up again when you have chosen your lock up policy. After you have chosen your lockup policy, the policy will lock the container, and you cannot unlock or delete the container until the retention period has been reached.
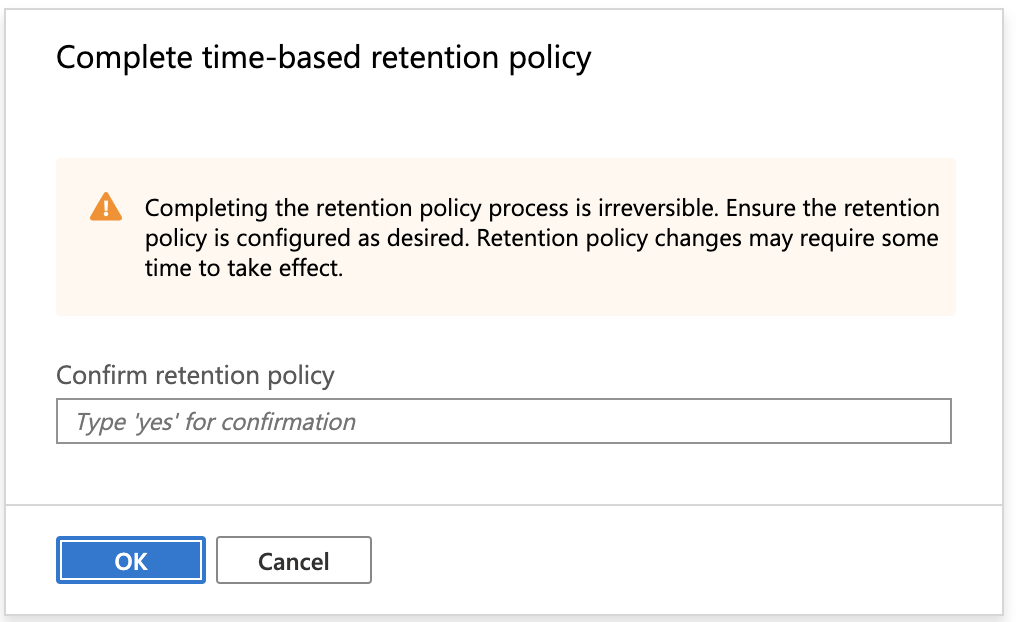
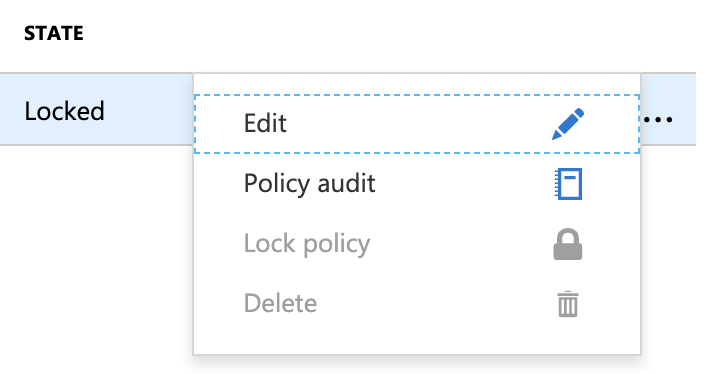
As you can see on this next screenshot, when an attempt is made to access the locked policy, the policy lock step is irreversible. After it is enabled, you cannot remove it until the retention period ends.
I know you will try this, so I took a screenshot to show you that Microsoft is serious about protecting your Immutable container:
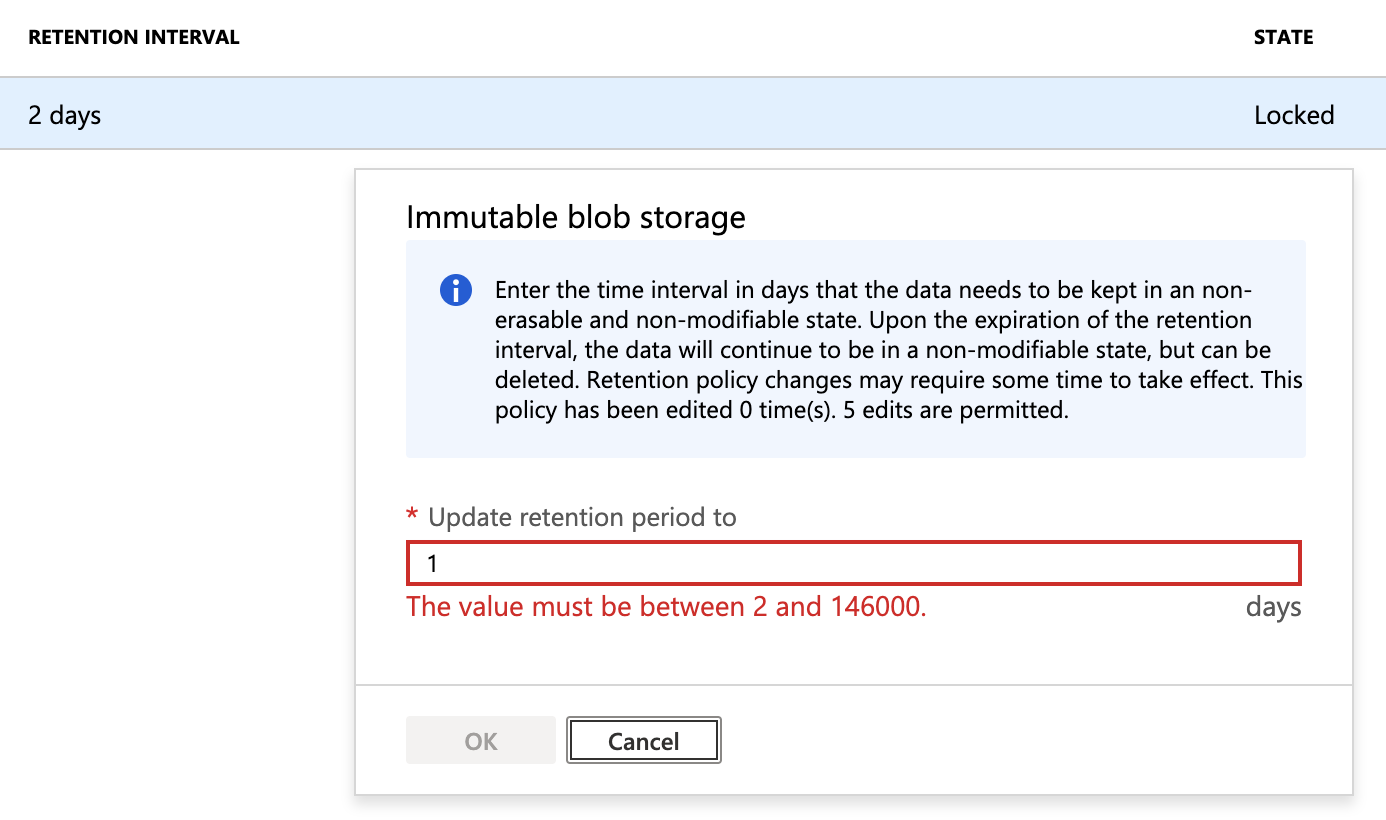
Oh, and one more thing; as you can see on that previous screenshot, there is an option to edit the policy. However, you can only extend the retention period, not reduce it. The screenshot below shows what happened when I tried to reduce the retention period from two days down to one day. I show you this to save you trying it. If you read the fine print in the popup message, you will see that you can edit the retention period only five times.
Upload Your Data
After completing the setup of the container, you are ready to upload your business-critical data and save it into your new blob container. The retention policy will be applied to the uploaded data within 30 seconds of loading. Remember, after loading your business-critical data and the policy is applied, you cannot modify or delete it until the end of the retention period.
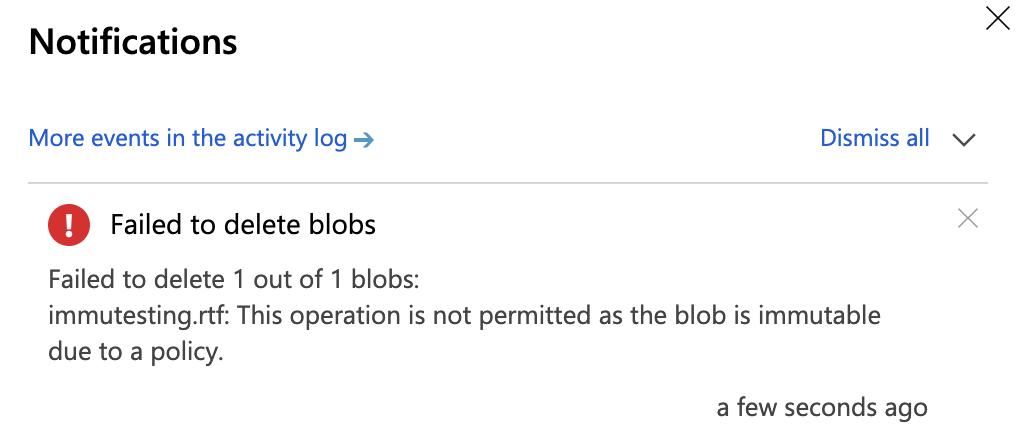
Just to show you what happens, I tried to delete a file that I had just uploaded. Sure enough, I received the following error message. I received the same message when I tried to modify the file:
Conclusion
On this blog post, I gave you the basics on how to create and configure your first immutable Azure Blob storage to protect your business-critical data. This blog post will be the basis of another blog post I’m working on, where I will extend my examples of this functionality to help you to use this great feature to protect your on-premises business-critical data for longer and safer retention.
